

Quinoa Stuffed Sweet Potato
Served with a homemade chimichurri sauce and fresh cilantro.
My mind is always thinking about new recipes. I get bored of the same old meat and veggies, so I love trying as many different flavor combinations as possible. This way, I expand my palette and creativity. One food I don’t eat too often is sweet potato, which is why I challenged myself to eat it. I randomly had a craving for it one day and decided to stuff a sweet potato for dinner. This was what my mind thought of after a long day of work. It came out to be a mix of chili without the beans and a sauce on top to add some brightness to the dish of mostly dark colors. I know it might sound like a lot of ingredients, but making your own sauces makes the meal taste that much better. Think about how much sugar you are saving when you make your own sauce. I understand it takes more time to do this, but it’s worth it in my opinion. Give my stuffed sweet potato recipe a try. I made a homemade chimichurri to elevate the dish to the next level.
Ingredients:
3 sweet potatoes
1 lb flank steak marinated overnight if you wish. I used bread and butter pickle juice
** (if vegetarian use 1 15 oz can of black beans, rinsed, drained, and patted dry)
1 cup of cooked quinoa
1 Tbsp. Avocado Oil
2 Tbsp. Extra Virgin Olive Oil
1/2 red onion, diced
2 carrots, diced
2 celery stalks, diced
1 bell pepper, diced
1 Tbsp. chili powder
1/2 Tbsp. paprika
2 Tsp. ground cumin
Salt and pepper, to taste
Roasted tomato sauce (see recipe below or used canned tomato sauce)
Top with cilantro and chimichurri sauce (see recipe below)
For the roasted tomato sauce:
3 vine-ripened tomatoes, halved
1 Tbsp. Extra Virgin Olive Oil
1/4 red onion
5 cloves of garlic
1 tsp ground oregano
1/2 tsp ground basil
1/2 tsp Italian Seasoning
Salt and pepper, to taste
** Optional: Adding everything bagel seasoning to the sauce
For the Chimichurri:
2 cups packed parsley leaves (or one bunch), stems removed
3 to 4 garlic cloves (1 tablespoon minced)
1 medium shallot
1/2 to 3/4 teaspoon fine sea salt
1/2 to 1 teaspoon crushed red pepper flakes or 1 jalapeño or Fresno chili pepper, finely chopped
1/4 cup extra-virgin olive oil
1/4 cup vegetable broth
1/3 cup + 1 tsp red wine vinegar
Kitchen Tools:
High Powered Blender (Vitamix)
Large Skillet
Cast Iron pan
2 baking sheets
Directions:
1) Preheat oven to 425 degrees F.
2) Wash your sweet potatoes thoroughly. Poke holes in each sweet potato and put on a foiled baking sheet. Bake for 50 minutes.
3) On a separate baking sheet, add your tomatoes, red onion, and garlic. Drizzle Extra Virgin Olive Oil and season with salt and pepper. Put it in the oven for 35 minutes.
4) While everything is cooking, make your quinoa with 1/2 cup dry quinoa with 1 cup water. Rinse your quinoa first before adding it to a pot. Set the heat to medium-high on your stove and let it come to a boil. Cover and reduce heat to medium-low for 15 minutes or until all the water has evaporated. Fluff with a fork and set aside.
5) Chop your veggies. In a large skillet, heat up your pan to medium heat and add your oil. Add your veggies and saute until everything is soft. Season your veggies and keep stirring. Once they are done, turn the pan to low heat. If you're doing the vegetarian version, you can add the black beans at this point.
6) While the veggies are cooking, in a cast iron pan, cook your flank steak. First, heat up the pan to medium-high heat. Once the pan is hot, add 1 Tbsp. of Avocado oil. Add your meat and cook for 5 minutes or until it has a nice sear. I added some leftover juice to help add some moisture before flipping. Stand back because it will splatter and yes I did splatter myself during this step. Cook for another 5 minutes or until it has a nice sear. Cook until it gets to the desired temperature. I cooked mine at 165 for medium, but you can cook it a bit less (3-4 minutes on each side if you want it more of a medium-rare). Remove from cast iron and let it rest before cutting into it.
7) When the sauce is done, blend everything in a high-powered blender. Add quinoa and sauce to the veggies. Only add as much sauce as you need to fully coat everything. There will be leftovers, which I used for chili the next day. At this point, you can cut your meat into strips or cubes, as I did.
8) When the sweet potatoes are done, let cool for 5 minutes. Cut in half and mash them a bit. Add your veggie and quinoa mixture on top of the sweet potato. Top it with meat and throw it in the oven for 5-10 minutes.
9) Make your chimichurri sauce real quick by adding everything to a blender. I used a Nutri-bullet for this because there wasn't a ton and I didn't want to dirty up the Vitamix.
10) Top with cilantro and chimichurri. Enjoy! :) I ate about half a sweet potato, which I would say is an appropriate adult serving size. :)

If you want to jump in the screen and eat this sweet potato, I can help you manage your time effectively and create a meal plan with you that aligns with your goals. Contact Rachel for more information.
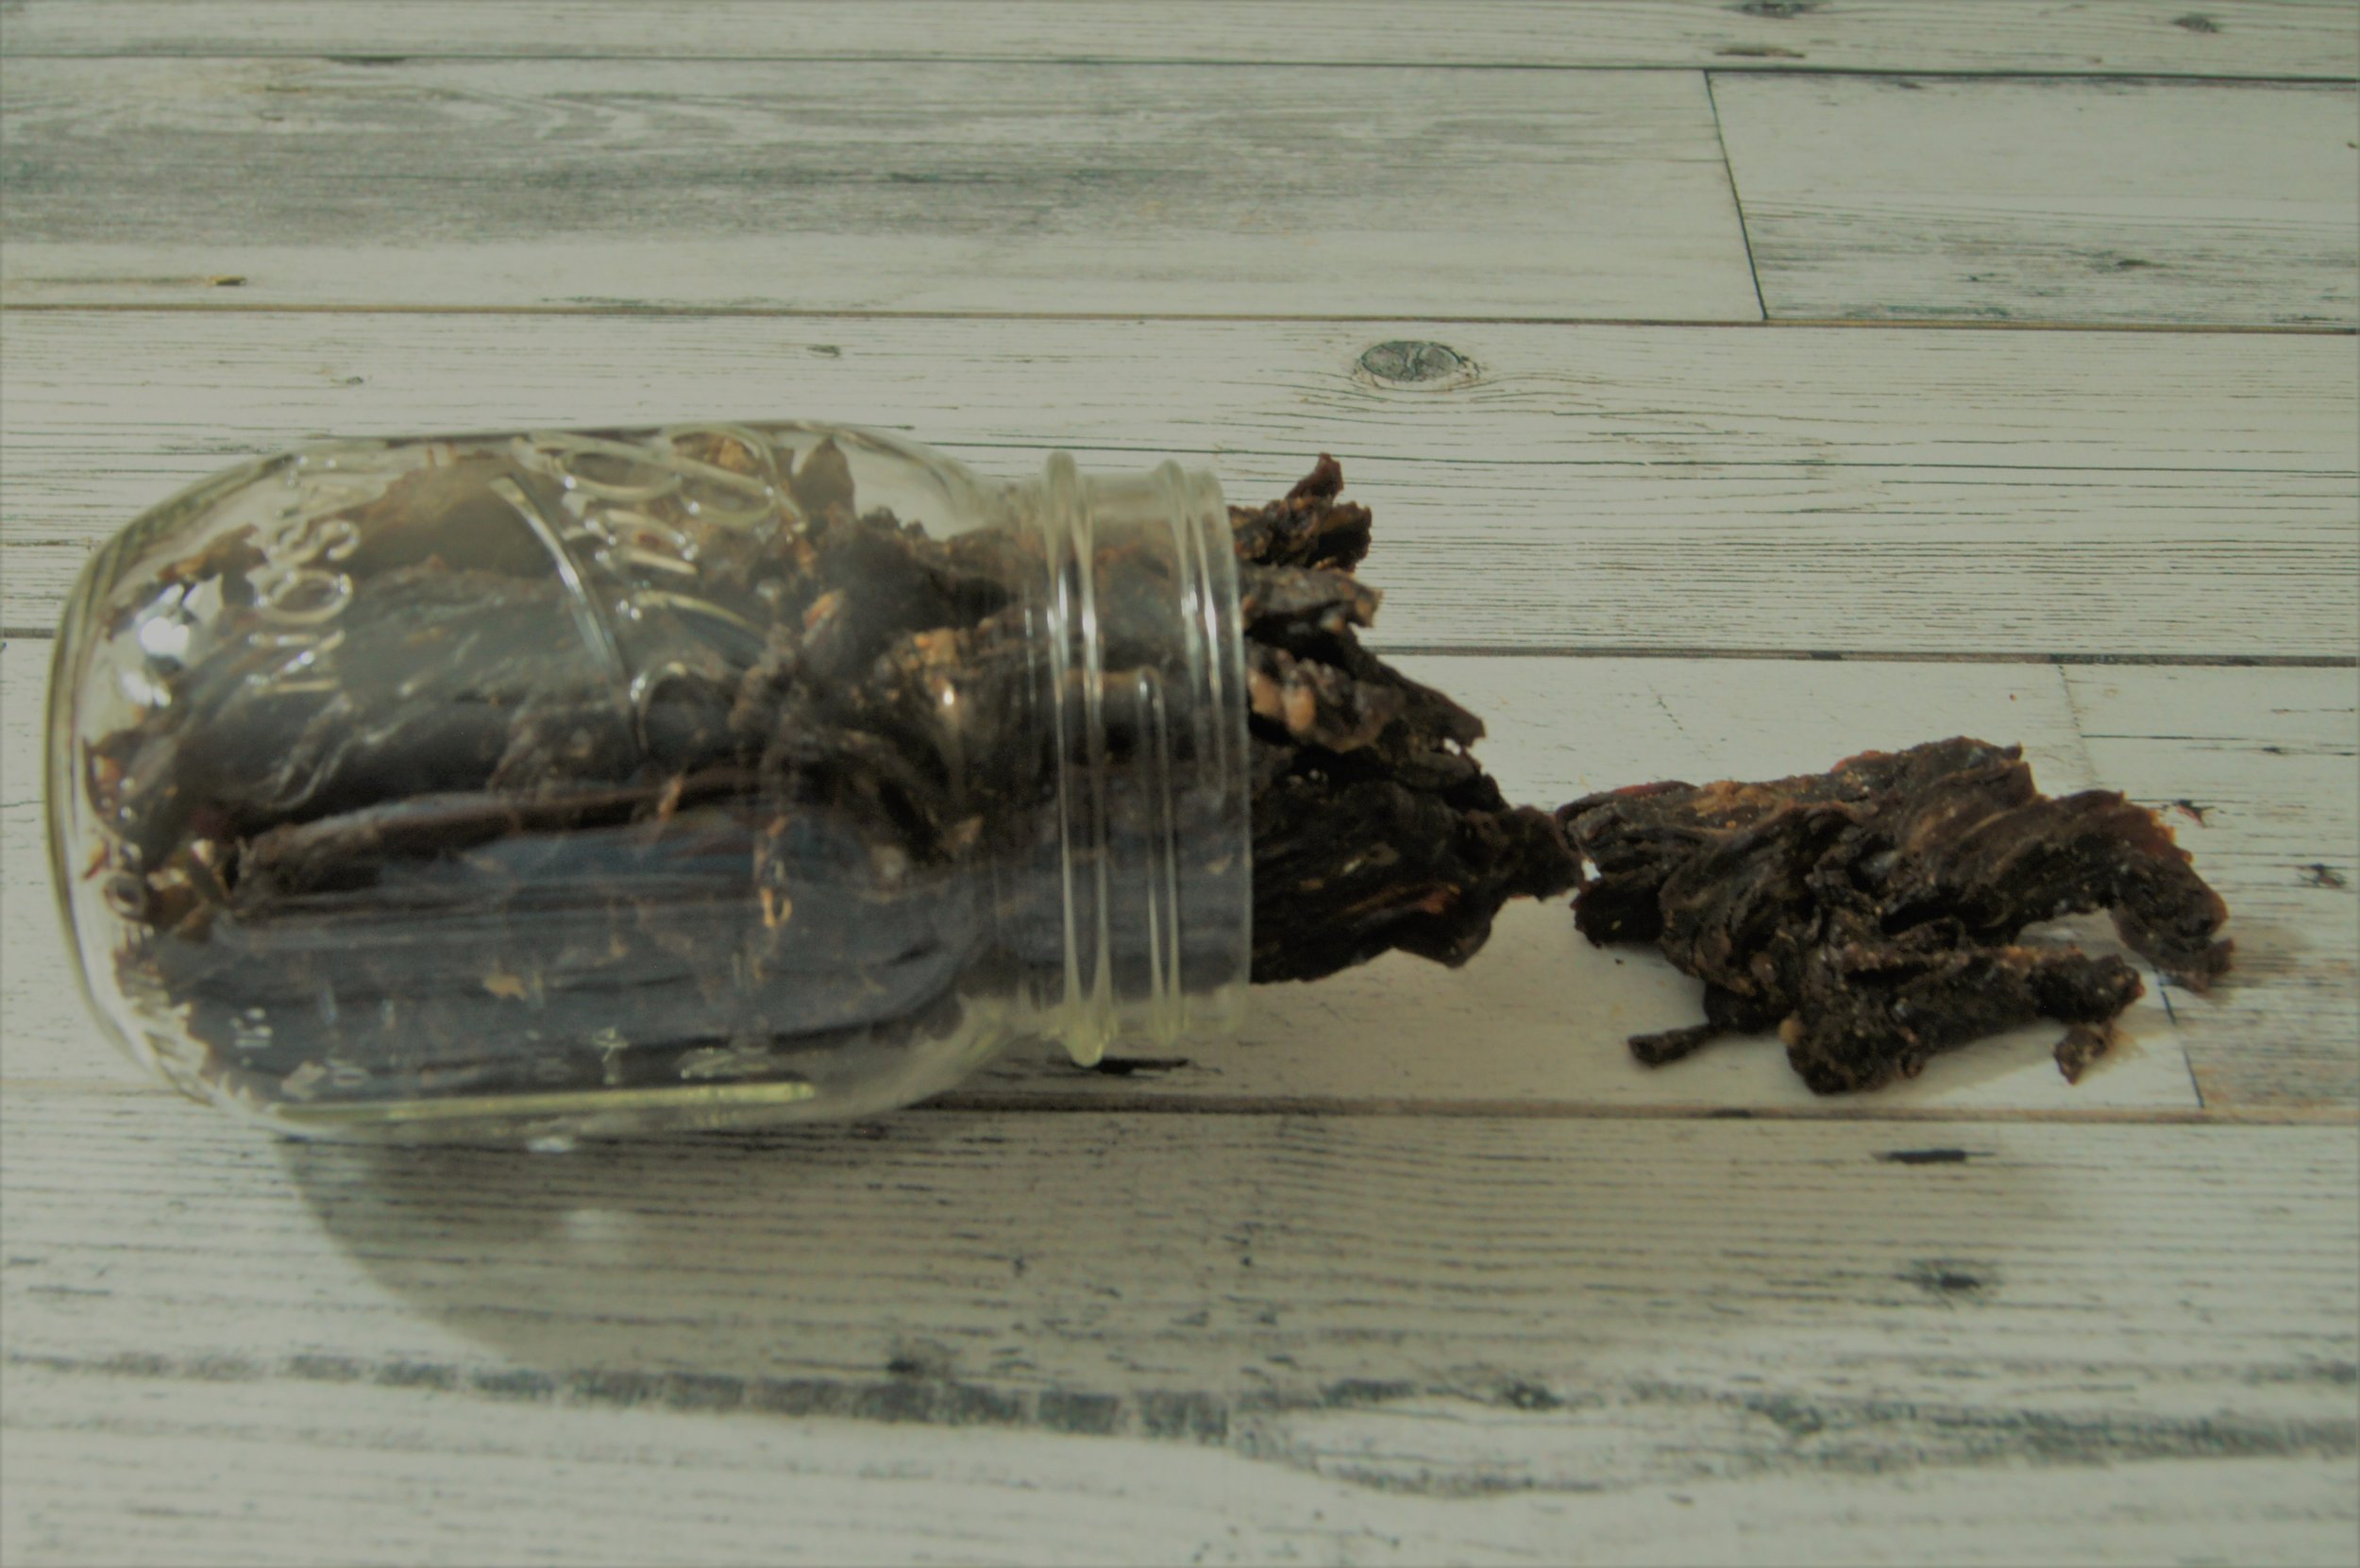
Homemade Beef Jerky
4 different recipes to make beef jerky at home.
Beef jerky has been around for hundreds of years when hunters and gatherers would use this method to preserve the meat to last longer. By pounding the meat thin, adding salt, and drying it out or smoking it over a fire, it helped preserve the flavor and longevity.
Beef jerky is a great snack for school, camping, or on the go because it leaves minimal mess. It used to be seen as a healthy snack until large corporate food companies starting adding sodium nitrate to have the meat last even longer. Although it has healthy factors such as a high protein count, low caloories, low fat, and low carbohydrates, most brands now are loaded with sodium and sugar. Yikes! You'd be better off eating a cookie at that rate. It gets better. The beef you are eating isn't even locally sourced. It's processed and shipped from another country such as South America. Talk about total freshness. I mean, that's what companies are advertising when they want you to eat their product over another.
One serving of jerky seems healthy right? I noticed that when I started eating packaged jerky that I would not only want to eat the whole thing in one sitting, which is 3 or 4 servings. That ends up being more calories than eating a well-balanced meal. Those nitrates are addicting and trick your brain into wanting more while turning off the part of your brain that says it's full. Newsflash, it's because you're not getting enough nutrients and losing water. Oh and I can't forget how bloated I felt afterwards. No amount of water could save me after that mishap.
While it may be a bit of extra work and clean up, it is worth making your own. Whether you use your oven or dehydrator is up to you, but I found that the dehydrator function on my Instant Pot Duo Crisp has been amazing. I never even used that setting until I started making my own jerky. You could use flank steak, eye of round, or top round steak because they are all lean cuts of meat. I like to marinate mine in different sauces overnight before dehydrating it, which lets the meat soak in those delicious flavors. I can literally throw it in the dehydrator in the morning and it's done by the end of the day. It's super convenient and I take this on all my camping trips. It helps me curb my cravings when I'm super hungry and no food is around in the middle of the woods. Storing it is easy peasy. Put it in a ziploc bag in the fridge if you're going to eat it right away. or vacuum seal it for extra freshness.
Mix and match different flavors and let me know which one you like the best. I listed my favorite recipes I've used to make my own beef jerky, which I'm excited to share below.
Sweet and Smoky Beef Jerky
2 pounds flank steak (or eye of round or top round steak)
1/2 cup low-sodium soy sauce (or enough to fully cover the meat)
1/4 cup vegetable stock
1/4 cup maple syrup
2 tsp Worcestershire sauce
2 tsp coarsely ground black pepper
1 tsp liquid smoke
1 tsp onion powder
1 tsp seasoned salt
1 tsp garlic powder
1 tsp dried mustard powder
1 tsp Flavor God Honey BBQ seasoning
1 tsp crushed red pepper flakes (optional)
Dill Pickle Beef Jerky
2 pounds flank steak (or eye or round or top round steak)
Leftover dill pickle marinade (or use already made dill pickle juice)
Sweet Pickle Beef Jerky
2 pounds flank steak (or eye or round or top round steak)
Leftover bread and butter pickle marinade (or use already made bread and butter pickle juice)
Honey Mustard Jerky
2 pounds flank steak (or eye of round or top round steak)
1/2 cup Honey
1/2 cup Dijon Mustard (Not Pub Style)
1/4 cup Worcestershire Sauce Containing Tamarind
1 tsp Liquid Smoke
1/2 tsp Cumin
1/2 tsp Chili Powder
1/2 tsp Paprika
1/2 tsp Lawry's Seasoned Salt
1/2 tsp Sea Salt
1/2 tsp Black Pepper
1/2 tsp Garlic Powder
1/2 tsp Onion Powder
1 tsp dried mustard powder
1 tsp Flavor God Honey BBQ seasoning
Spicy Kimchi Jerky
2 pounds flank steak (or eye of round or top round steak)
Leftover kimchi brine (or use premade Kimchi brine)
Directions:
1) Cut your steak into thin slices against the grain for a more tender jerky or with the grain for a more chewy jerky. I cut mine on an angle against the grain for a longer piece. I suggest popping your meat in the freezer for 15-30 minutes to make it easier to slice. Or you can ask the butcher behind the meat counter at the meat market to do it for you.
2) Put your steak in a Ziploc bag and add the seasonings to the bag. Close the bag and shake it around until everything is fully incorporated.
3) Close the bag and let it marinate overnight for the best results. You can do it for less time if you're short on time, but I wouldn't recommend it.
4) In a dehydrator, spread out your meat without making them too crowded (or else it won't cook all the way). For the best results, heat your dehydrator to 165 degrees and cook for 8 hours. I have been using the dehydrator function on my instant pot duo crisp. Make sure to use the extra rack to give you more room. The jerky is done once it's dry and firm, but still a bit pliable. You don't want it to be too chewy. I prefer mine to be almost crispy, like bacon.
5) Once it's done, let it cool and place in a sealed container. Serve immediately. Refrigerate for up to a month or vacuum seal it to last longer. If it lasts that long. ;)


Quinoa Stuffed Peppers with Cilantro Lime Vinaigrette
The cilantro lime vinaigrette makes this dish next level.
I have been craving stuffed peppers for a long time. However, I haven’t cooked these in 5 years. Stuffed peppers are something I would eat as a child on a regular basis. Either, my parents would cook them or I would eat it out of a Stouffer’s frozen dinners. They tasted like I wanted more. I could down 3 of those peppers and still be hungry. I wanted to find a way to amp the nutrition and quality without compromising the childhood nostalgia. Quinoa has become a staple for being able fill me up more than rice. Since quinoa is a complete protein, it digests slower in the body than your typical carbohydrate counterpart. You’ll get fuller faster while eating in a way that energizes your body. The added vegetables add more bang for your buck by being able to stuff more nutrients in each pepper. The best part is that this dish can be modified to fit your dietary needs. You can add ground beef or turkey for an extra protein kick or use beans to make this dish plant-based. Adding dairy is completely optional. My homemade cilantro lime vinaigrette is what takes this pepper to the next level because you won’t find anything like this in a restaurant. Find my out-of-this-world recipe below.
Ingredients:
5 red peppers, seeded and sliced in half
½ cup uncooked quinoa
1 lb ground beef or turkey (85% fat and 15% lean)
** Note: Can swap for 1 15 oz can of black beans (drained and rinsed) if vegetarian
1 cup water or vegetable broth
4 Tbsp. Extra Virgin Olive Oil
½ onion, diced
3-4 ribs of celery, chopped
1-2 fresh tomatoes, diced
1 jalapeno, seeded and chopped
1 5 oz bag of spinach
4 cloves garlic, minced
1 Tbsp. chili powder
2 tsp paprika
1 tsp cumin
1 tsp dried oregano
½ tsp dried basil
1 cup cheddar or pepper jack cheese (can omit if dairy-free)
For the Cilantro Lime Vinaigrette
½ bunch of cilantro, washed and patted dry
2 Tbsp. Extra Virgin Olive Oil
2 Tbsp. water or vegetable broth
1 lime, juiced
1-2 Tbsp. honey
1 clove garlic
1 cap full of apple cider vinegar
Salt and pepper, to taste
Directions:
1) Preheat the oven to 375 degrees F.
2) Wash and rinse the quinoa before placing it in a pot with 1 cup of water or vegetable broth. Bring the water to a boil. Then, cover and let simmer until all the water has evaporated (15-20 minutes).
3) In a sauté pan, begin cooking the ground meat until it is all browned (10-15 minutes). Drain in a colander to remove excess grease from the pan.
4) Cut your vegetables. In a separate sauté pan, turn the heat to medium. Add the oil and wait for the pan to heat up for 1 minute. Add the onions and celery. Sauté for 3-5 minutes until they get soft. Add the jalapenos and stir for another minute. Add spinach, tomatoes, and garlic. Stir until the spinach is wilted.
5) Prepare your peppers and place them on a 9x9 casserole dish with cooking spray. Cut the pepper in half the long way. Clean the pepper by removing the white part and the seeds.
6) Once the meat and quinoa are fully cooked, combine with the vegetables. Stir to combine and add seasonings to the mixture.
7) It’s time to stuff the peppers now. With a spoon, evenly fill all the peppers and top them with cheese.
8) Place the peppers in the oven foiled for 40 minutes.
9) While the peppers are cooking, prepare the cilantro lime vinaigrette by placing all the ingredients in a high-powered blender. Adjust ingredients to preferred taste. Place the dressing in a bowl and set aside.
10) When the peppers are done, remove from the oven, uncover, and serve with cilantro lime vinaigrette. Enjoy!

Looking for some more recipes to stay on track while being in quarantine? Check out my new recipe e-book “Quarantine Clean Eating” using ingredients you already have in your pantry.

Crockpot Unstuffed Cabbage Soup
Stuffed cabbage in a hearty soup form. Great for cold, winter nights.
Quarantine is in full swing here in Chicago. The governor recently ordered a full shut down, which means I’m going to be stuck inside until further notice.
I’m doing my best to find the light in the situation. For the last few months, I lost my desire to cook for myself. I fell victim to my circumstances. After working in the kitchen, I went home exhausted, bitter, and lifeless.
I wasn’t sure what my next move was going to be. I knew I needed to make one fast if I wanted to get out of the above state of mind.
During the slow season at the kitchen, I obtained a NASM-CPT to become a certified personal trainer. I managed to find a new place of employment shortly after I passed my exam. It doesn’t matter now anyway since I can no longer work there until the whole COVID-19 situation blows over.
What the hell am I going to do with myself? Living with people who are overly anxious to begin with before the outbreak has allowed me to look deep within myself on how I can stay calm during the storm. Since I can’t change them, I can change how I react to their anxiety.
The most optimal solution I have used during this time is cooking. Since I have unlimited amounts of time to spend, I’m choosing to spend it focusing on my health. It’s the best way to protect myself during such unknown, unprecedented times. Since it’s difficult to feel safe around my loved ones, I can find safety from within.
Cooking allows me to connect with Mother Nature by using wholesome ingredients in my food. All my recipes are made from scratch. My diet consists of gluten and dairy-free recipes that help tremendously with inflammation.
While I worked in the kitchen, I was eating a lot of fried food that was around, which was reversing years of time I spent focusing on my health. It was taking its toll on me because I got sick 3x in a matter of fewer than 5 months.
I’m going to come out of this outbreak healthier than I was going into it. I was experiencing episodes of burn out, which subsided once I started eating less fried food. Today is officially my two month anniversary of not eating any fast food. When I eat healthy, it is easier to control my mood/reactions to stimulus around me.
My health is what keeps me alive and I want to do everything in my power to be the strongest version of myself that I can possibly be in this lifetime. By cooking my own food at home, I’m releasing generations of digestion problems that have been passed down to me on both sides.
I’m blessed to have a crockpot because that is going to be my best friend for the next few weeks. It’s still cold here, which means soups and stews up the wazoo.
My parents had some cabbage laying around that they wanted me to use before it went to waste, which became the inspiration for this recipe.
I grew up eating stuffed peppers, which brought to life this hearty soup. I feel even more full eating this than the stuffed pepper version.
Making this recipe allowed me to have tons of leftovers to stockpile in order to have enough fresh meals to get through this tough time.
The recipe is as follows below:
Ingredients:

1 lb ground beef 85% lean 15% fat
1/2 green cabbage, thinly sliced
1 15 oz can diced tomatoes
3-4 cloves of garlic, minced
3 tbsp extra virgin olive oil
1 tsp dried oregano
1/2 tsp dried basil
salt and pepper to taste
For the Rice:
1 cup white or brown rice
2 cups water or chicken broth
For the Soup:
1 28 oz can fresh vine-ripened tomatoes
1 15 oz can chicken broth
1/2 cup ketchup
1 tbsp Worcestershire sauce
1 /4 tsp liquid smoke
2-3 cloves of fresh garlic
1 tsp apple cider vinegar
1/4 cup turbinado sugar
1 8 oz can tomato sauce
1 tsp dried oregano
1/2 tsp dried basil
salt and pepper to taste
Directions:
Cut cabbage into thin slices (see the video on how to cut cabbage here)
Preheat oven to 400 degrees F
On a foiled sheet pan, place cut cabbage, minced garlic, olive oil, and spices. Stir evenly to coat vegetables with seasoning.
Cook for 25 minutes stirring halfway through to avoid burning.
While the cabbage is roasting, combine water with rice and begin heating on medium/high heat until it comes to a boil.
Reduce heat to medium and cook until water is evaporated (15-20 min)
Cook ground beef in a skillet, stirring constantly until cooked through. Drain in a colander with a paper towel over it to help eliminate grease.
Blend all ingredients for the sauce in a high powered blender.
Combine all ingredients (minus the rice) in the crockpot and set it on low heat for 5 hours.
Combine cooked rice into the crockpot 30 minutes before serving. Enjoy!
While you are at home, take this opportunity to learn to cook for the health of your family. I have developed a recipe book of over 50 recipes to provide you with inspiration to begin your journey of adopting a healthy lifestyle. Take the time to support small businesses in order to allow us to be able to share our craft with the world.

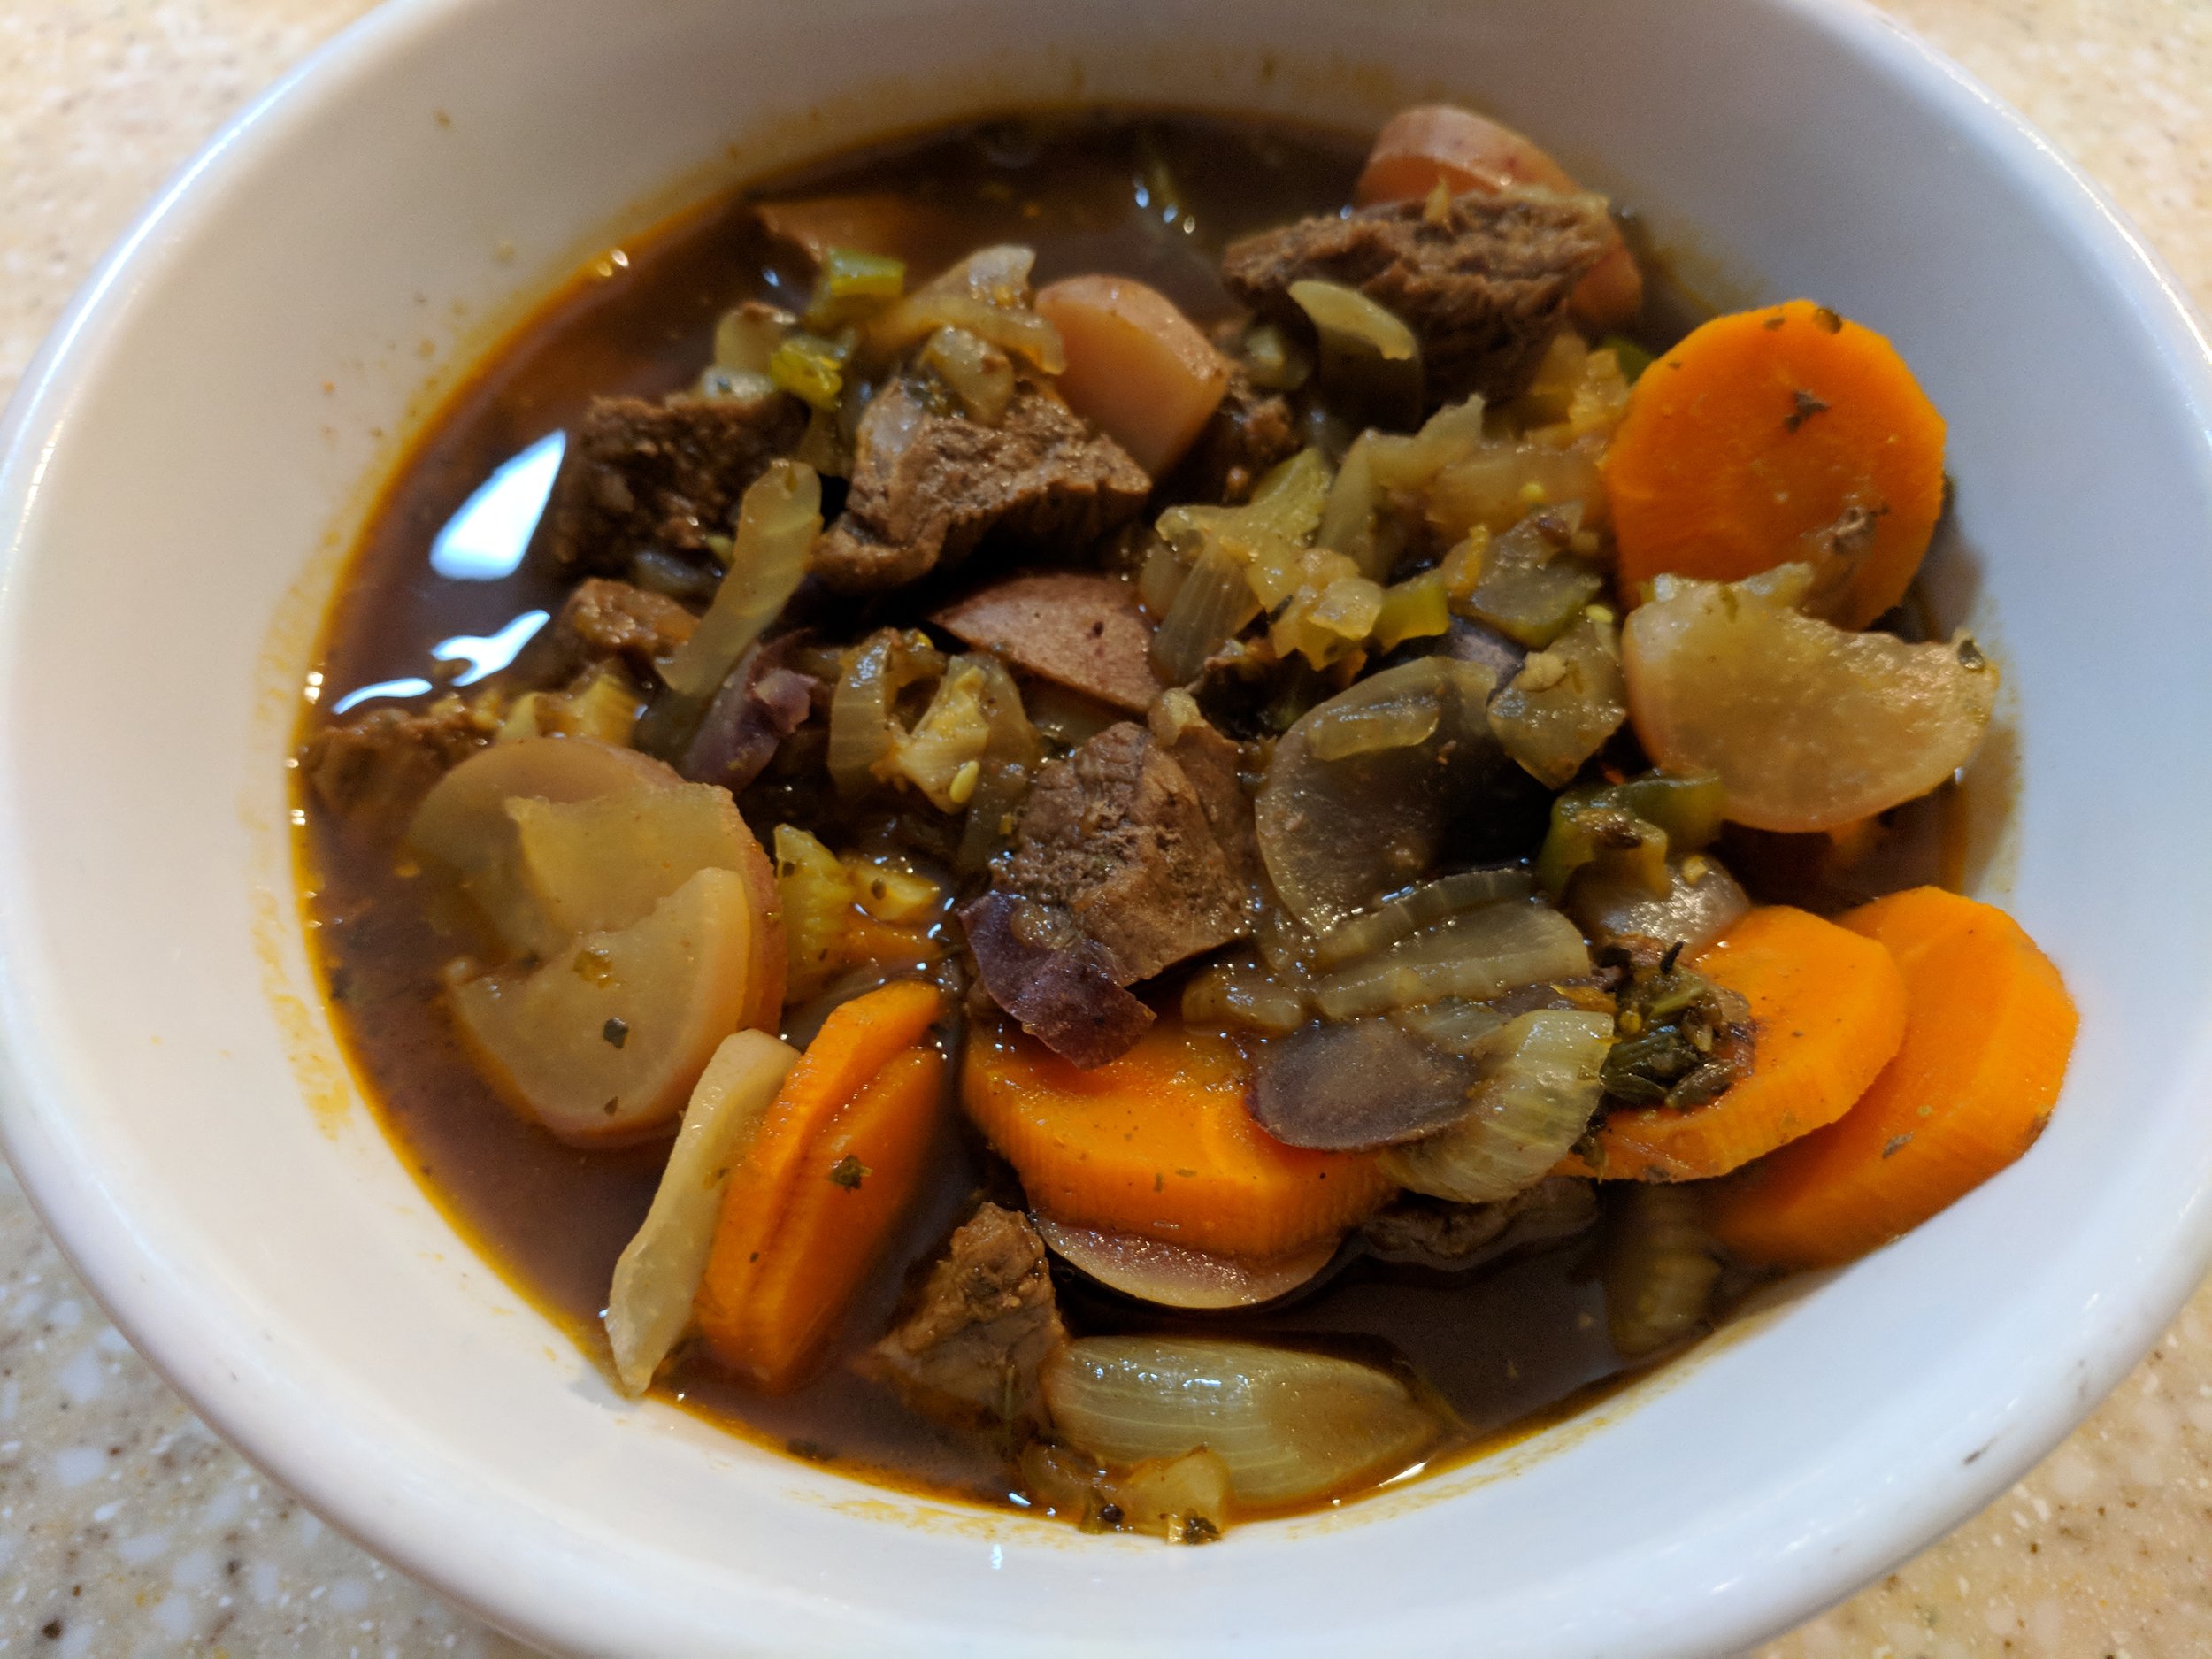
Beef Stew
With carrots, celery, and greens (optional), this amazing beef stew recipe courtesy of My Heart Beets is a well-rounded dish that will keep you full for hours!
If you are a meat and potatoes lover, this recipe is definitely for you.
I grew up eating some type of meat and potatoes dish all the time.
Whether it was a burger and fries, meatloaf and mashed potatoes, or whatever, it was always on my plate in some form.
A lot of times, when you think of meat and potatoes, it can be quite a heavy dish without a lot of nutrition.
Sure, you get protein and starchy carbs, but a lot of times, there is no source of vegetables.
When you make a stew, it is a great way to make a hearty and warming meal that is also full of delicious vegetables.
With carrots, celery, and greens (optional), this amazing beef stew recipe courtesy of My Heart Beets is a well-rounded dish that will keep you full for hours!
As a bonus, this recipe yields a ton of leftovers, which are great for easy weekday meals.
Check out the recipe below:
Ingredients:
2 tablespoons avocado oil
1 pound beef stew meat
1 onion, diced
3 garlic cloves, minced
1 serrano, seeded and chopped
1 teaspoon salt
1 teaspoon paprika
½ teaspoon freshly ground black pepper
¼ teaspoon cardamom
¼ teaspoon cinnamon
¼ teaspoon oregano
Big pinch of nutmeg
¼ cup red wine
4 – 6 cups beef or chicken broth*, divided (I used beef broth for this one)
3 large carrots, chopped
2 stalks celery, chopped
4 gold potatoes, cubed
1/2 cup of mixed greens (spinach and kale are great additions)
Cilantro, optional
Directions:
Heat the oil in a dutch oven over high heat (a regular pan will work as well).
Add the beef and sear on all sides for about 5 minutes.
While the beef is cooking, begin chopping your vegetables.
In a separate pan, set your heat to medium, add the onions, garlic, serrano and saute for 5 minutes.
Next, add the carrots, celery and potatoes to the pot and saute until the veggies are soft.
Add the spices, stir for a minute, then add the red wine and deglaze the pan.
In a stock pot (I use a cast iron ceramic one here), add 4 cups of broth, bring the pot to a boil then reduce to low heat. Add the meat and vegetables. Cover and cook for 1 hour, checking the pot at the halfway mark. If the broth has reduced too much, add the remaining broth.
To thicken the stew, mash some of the potatoes right in the pot and mix well.
Garnish with cilantro if desired and enjoy!

PS: This tastes really good when you dip it with crusty sourdough bread!
PPS: Looking for recipes to combat your food sensitivities, but don't know how to prepare them?
I have 55 all-new recipes that I've modified to be gluten-free and dairy-free.
Each recipe can be modified to fit your dietary needs.
Contains recipes for appetizers, breakfast, lunch, dinner, dessert, and crockpot.
As a bonus, I have included tips for some food swap ideas.
Ditch the takeout and bring the food back to your kitchen with my easy, healthy, affordable meals.

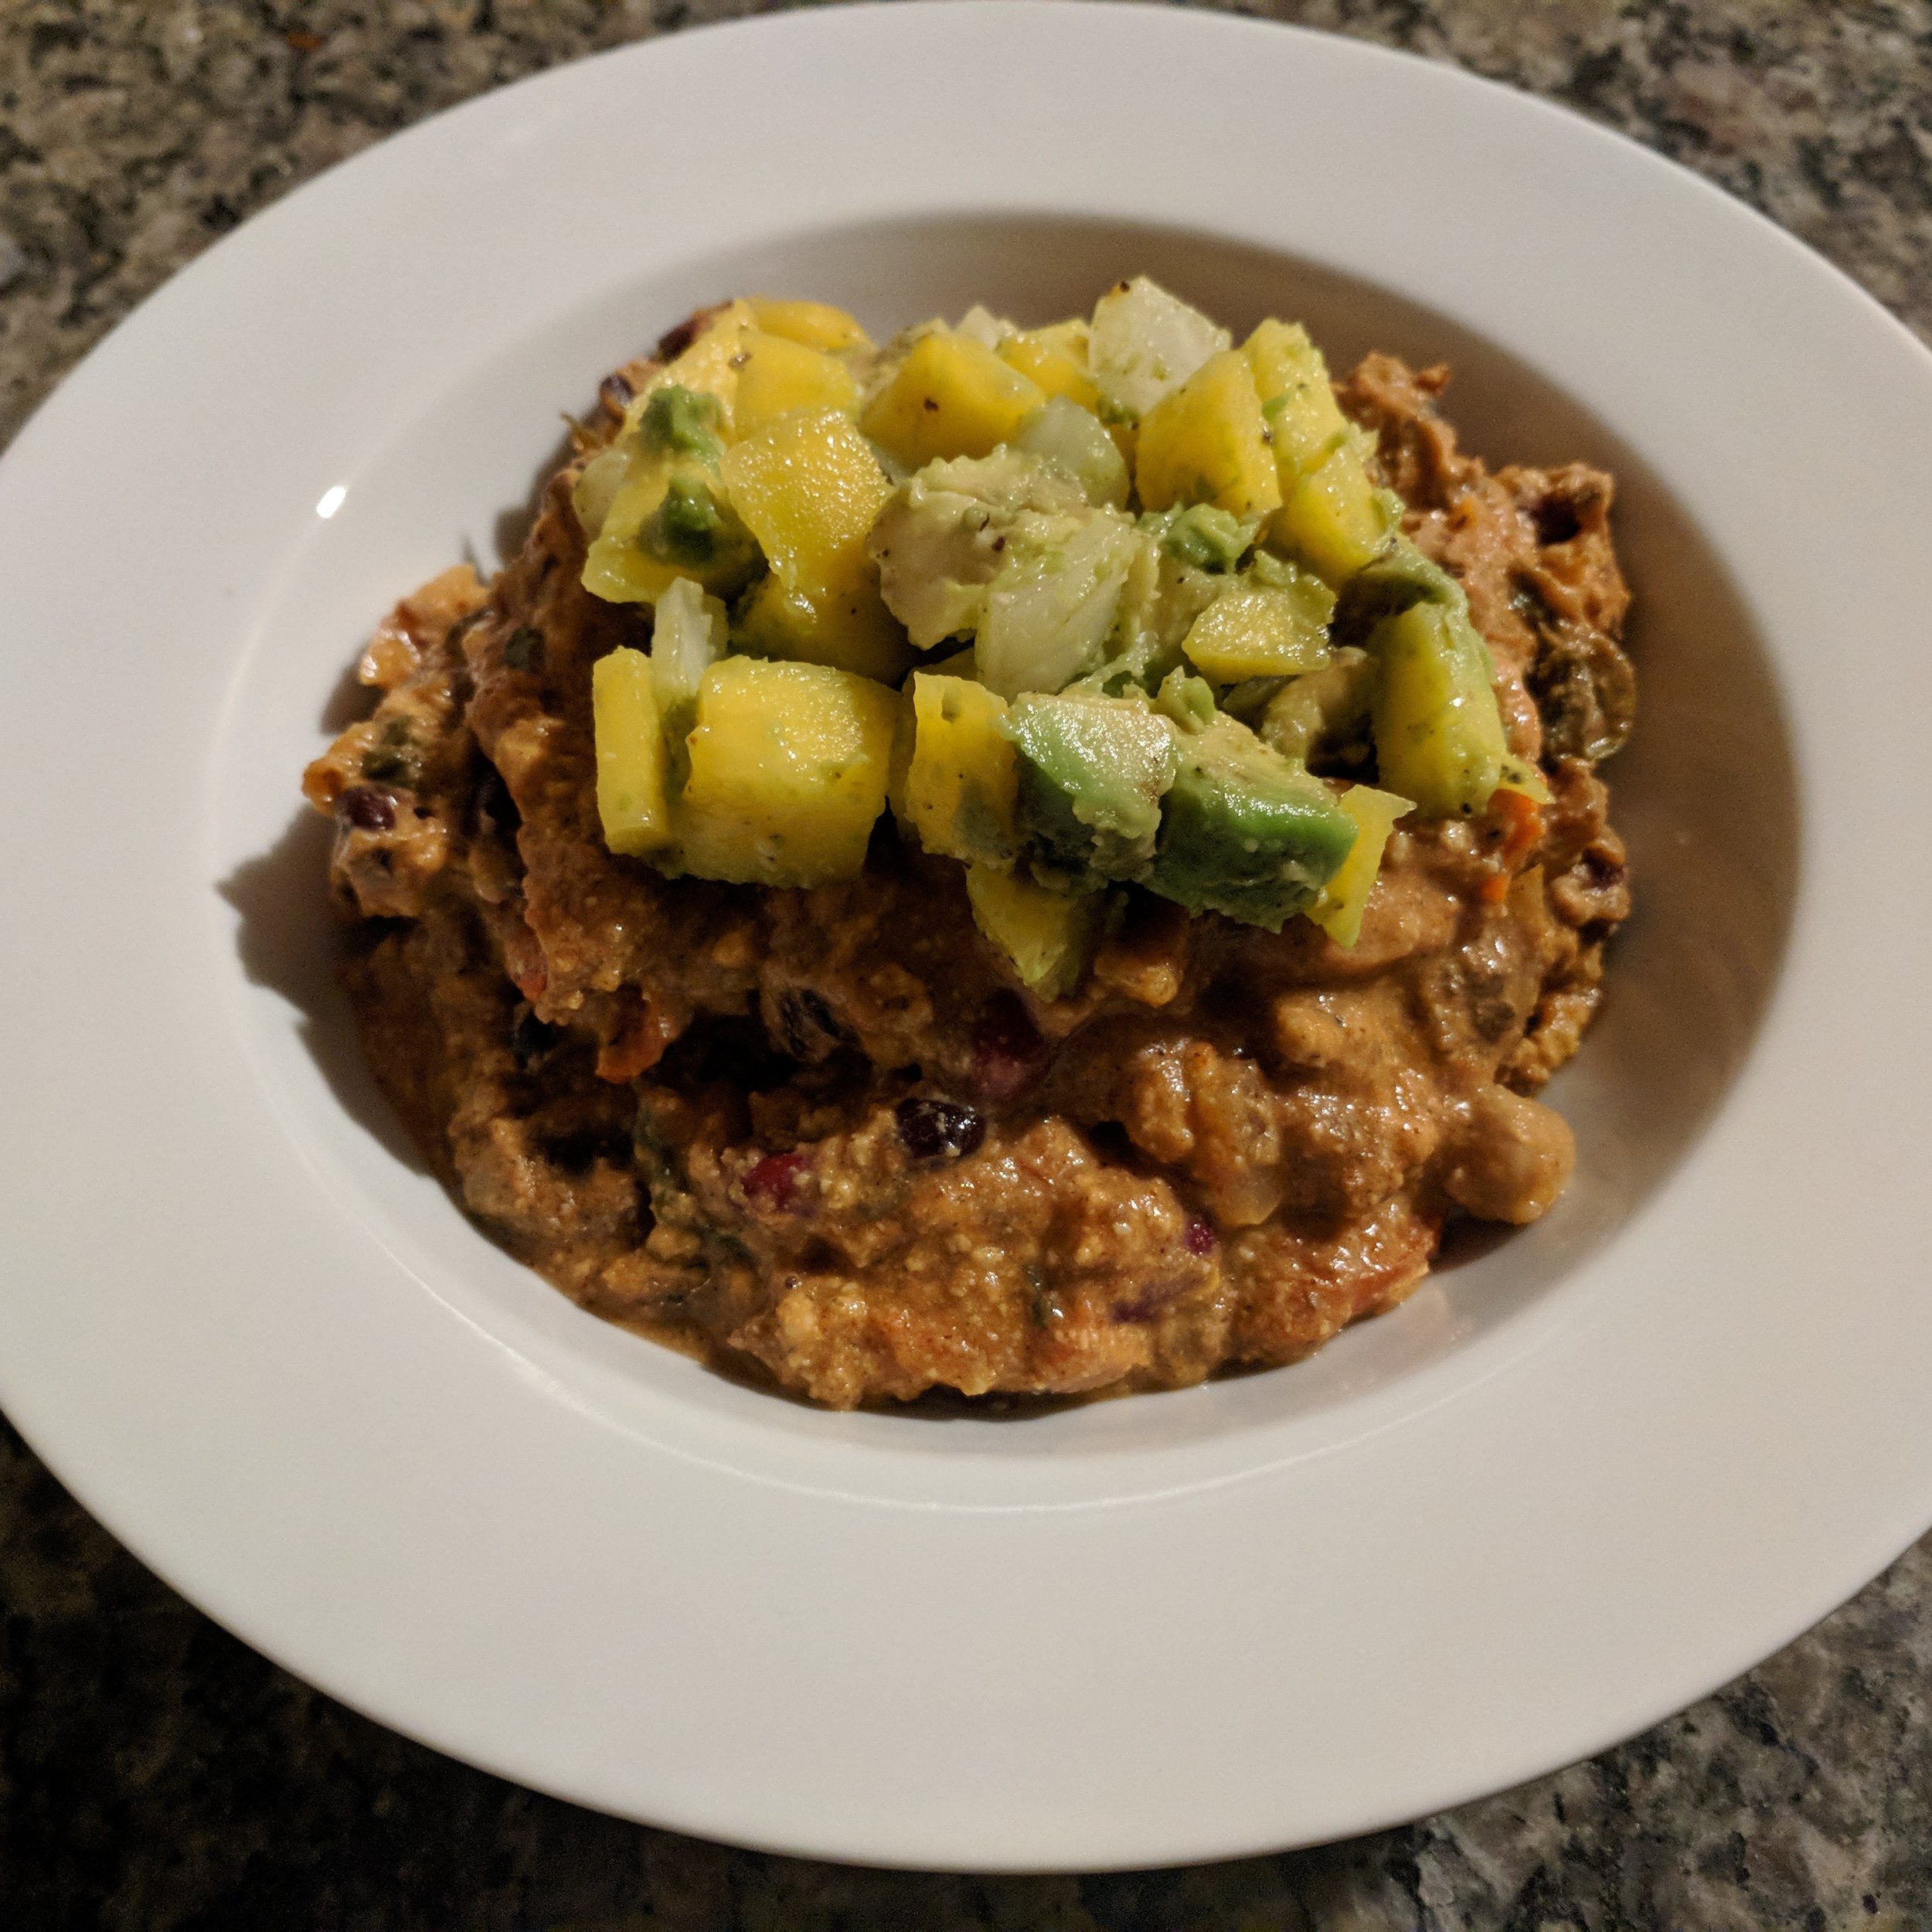
Cheezy Crockpot Chili
Crockpot chili with a dairy-free cashew cheeze sauce topped with mangos and avocado.
Late night munchies get you again?
What do you like to eat when you feel the cravings coming after a night out?
For me, I would go out to the bar, drink a few cocktails, and I ever so badly wanted pizza or nachos.
Sure, this seemed like a great decision in the short term, but afterward, I felt bloated.
I self-loathed and would regret every time I ate the unhealthy food.
Then, it hit me. Why don't I cook something healthy?
That way, I save money after a night out and I have a warm, tasty meal to look forward to.
This also tastes great as leftovers and freezes well. Beware, it might be all gone before you can even get to the freezer.
It's a combination of all of my favorite things in one without the guilt of unhealthy food AND it's dairy-free.
Leave it in the crockpot in the morning and come back to a house smelling like a taco joint.
I bring to you my Cheezy Crockpot Chili.
Ingredients:
For the Chili:
1 lb. ground beef (I used 85%/15%)
4 Cups vegetable or chicken broth
4-5 Beefsteak tomatoes
3 15 Oz cans of beans of your choice
1 6 Oz can of tomato paste
1 red onion, chopped
1 red bell pepper, chopped
4 Oz Portobello mushrooms, chopped
1 10 oz. bag of spinach, chopped
5 Cloves of garlic, minced
1 Tbsp. chili powder
1 Tsp. paprika
1 Tsp. cumin
1 Tsp. dried oregano
1 Tsp. dried basil
1 Tsp. dried thyme
1 Tsp. sea salt
1/2 Tsp. black pepper
Optional Toppings:
Crackers
Avocado
Salsa
Cheese
Hot Sauce
Green Onions
For the Cheeze Sauce:
1 ½ cups raw cashews soaked overnight in cool water
1 lemon, juiced
1/3 Cup nutritional yeast
½ Cup vegetable broth
1 Tsp Chili powder
1 Tsp Paprika
1 Tsp Cumin
1 Tsp garlic powder
1 Tsp Worcestershire sauce
1/8 Tsp liquid smoke (optional)
Dash of hot sauce (optional)
Directions:
1) Cook the ground beef on the stove over medium heat. Strain with a paper towel when there is a lot of grease in the pan. Pat dry when all of the meat is browned.
2) Prep all of your vegetables and throw them in the crock pot. Add the vegetable broth to the crock pot.
3) Add your fresh tomatoes, garlic, tomato paste, and spices into the blender. Blend until smooth. Add to the crock pot.
4) Start the crock pot on high for 6 hours. 5) Prep the cheeze sauce. Don't forget to soak the cashews overnight unless you have a high powered blender or food processor. Add all of the ingredients to the blender and blend until smooth. Refrigerate until later.
6) An hour before the chili is ready, pour as much cheeze sauce as you desire (I did the whole thing) into your crock pot and stir until mixed through. Close the lid and allow the chili to cook for the remaining hour.
7) Serve with desired toppings. Enjoy!
Want to have 20 more recipes like this one that are gluten and dairy free? Find it here!