


Kimchi Pancakes
Just like you would get from the Asian store straight from your kitchen.
Just like you would get from the Asian store straight from your kitchen.
Growing up, I had a bunch of Korean friends who would share dishes with me that reminded them of home. From bulgogi to kalbe and a variety of fried rice, it was food my parents had never and would probably never prepare for me. I enjoyed it all and certainly more than the processed and less extraordinary foods back home. That said, there was a dish I didn't enjoy as much that was prepared around me quite often, Kimchi. As most of you may know, it’s a dish full of flavor and in this instance, it was incredibly spicy. So much so that I could hardly get it down! The level of spice was unlike anything I was familiar with and thus I wrote it off for the past two decades as food I just couldn't get down to.
Fast forward a bit, and one day I found myself at an Asian store shopping for a few essentials. There, they had prepared Kimchi pancakes, and being the spontaneous devil that I am, figured I'd give it another go. Lo and behold, I actually enjoyed them and boy did it open up my palette to new flavors again! I enjoyed them so much I decided I had to try and make a batch of my own some time, and it turns out that time is now :) Moving and leaving for Florida recently has offered me many an opportunity to expand in the kitchen, and expand I did. I started pickling a variety of delicious eats, including Kimchi, and realized just how amazing fermented foods were for my ever-changing gut health, especially with digestion as it’s always been a problem for me! Nowadays, I'll use Kimchi on fried rice, soups, and even salads without hesitation :)
About a month after I moved to Florida, I went to a Fourth of July party and I made the Kimchi pancakes for the first time for my friends to sample. They hadn't really tried my food yet, and I wanted an unbiased review of a dish unfamiliar to most people. By the time the night was over, the entire plate was almost gone, I was happy that the reviews came out positive. Not everyone enjoys Kimchi, but everyone who does enjoy this dish. It pairs well with a hoisin-based sauce that I made. The sauce elevates it to the next level by adding that level of sweetness from an already quite salty pancake.
All together, this dish has only 15 ingredients, which is less than what you would find in one that you would get from the store. Each part of this dish is a labor of love starting from the Kimchi all the way up to the sauce. I selectively choose my favorite dishes to share with the RAD fam. Find my recipe for Kimchi Pancakes below.
Kimchi Pancakes
Ingredients:
6 Tbsp. rice flour (or other GF flour)
1 cup drained, chopped Kimchi, plus 1/4 cup brine liquid (or 1/4 cup vegetable broth)
1/2 cup all-purpose flour
3-4 Green onions or 2 scallions, thinly chopped
1 large egg
1 Tsp sugar
Extra Virgin Olive Oil for frying (or use Vegetable Oil)
For the Sauce:
1/4 Cup Hoisin Sauce
3 Tbsp. Oyster Sauce
2 Tbsp. Mirin or Rice Wine Vinegar
1 Tbsp. GF Tamari or Soy Sauce
1/4 cup vegetable broth, divided
1 Tsp fresh ginger
1 tsp fresh garlic
Top with sesame seeds
Directions:
In a medium-sized bowl, stir together all ingredients, except oil until a thick batter forms.
In a large, nonstick skillet, heat 2 Tbsp. oil over medium heat. Scoop 1/4 cup servings into the pan and cook ~3-4 minutes or until golden brown. Flip and firmly press down on them with the back of your spatula. Cook for another 3-4 minutes on the other side until golden brown. Transfer to a wire rack or paper towel-lined plate to drain any excess grease.
Serve on a nice platter or separate plate and enjoy with the sauce.


Traditional Kimchi Recipe
You’ll never want to buy Kimchi from the grocery store again once you try this recipe!
Kimchi used to be one of my least favorite foods next to olives. It was so spicy that I would start hiccuping. My gut couldn’t handle the number of pepper flakes typically used in Kimchi. The first time I tried it was from a traditional Korean family from my friend’s mom who made it from scratch. I ate everything from Kalbi to fried rice to bulgogi, but I would veer away from the Kimchi. They would put it on everything and I never understood it.
Later in life, I started developing gut issues and looked into different fermented foods to help heal the lining of my stomach. A lot of different websites lead me to Kimchi. I knew that I needed to change my diet and accept more foods into my palette if I wanted to repair the lining of my intestines. However, my parents disliked it and would yell at me every time I would bring the smell of strong, fishy foods into the house when I used to live with them.
It wasn’t until I moved out on my own that I experimented with different fermenting techniques because I have a significant other to support my new lifestyle. Fermenting is a method that involves bacteria and yeast breaking down sugars to help preserve foods longer and produce healthy bacteria to improve digestion. It has also been associated with weight loss. The first time I tried making my own Kimchi was because I had a craving for Kimchi pancakes. It’s a savory pancake that pairs well with a sweet hoisin sauce to give me a healthy balance of sweet and salty. I added 4 tablespoons of Korean red pepper flakes thinking they were like traditional red pepper flakes. I could handle spice pretty well, but was I wrong! It was almost inedible even after I let some of my friends try it. Adding half a tablespoon or less seems to be the sweet spot so my mouth isn’t on fire.
Once I made my own Kimchi, I started to enjoy it because of the fishy taste with the cabbage. I add it to fried rice, ramen, or I’ll eat it straight from the jar as a snack to help curb my potato chip cravings. This recipe changed the way I view Kimchi because it went from being one of my least favorite foods to putting it on anything I can think of including my homemade Kimchi pancakes. I’m excited to share the recipe with the masses below. You’ll never want to buy Kimchi from the store again once you try this recipe.
Ingredients:
2 medium-sized heads of Napa cabbage, cut in 2-inch squares
** 3-4 large carrots, julienned OR 1 8 oz daikon radish, julienned
4 green onions, sliced small
½ cup kosher salt, divided
Water (distilled or filtered)
1-inch knob fresh ginger, minced
2 tsp sugar
1-2 Tbsp. fresh garlic, minced (5-6 cloves)
** 3 Tbsp. salted shrimp paste
1 Tbsp. fish sauce
** 1-5 Tbsp. Korean red pepper flakes
** Notes:
You can do both the radish and carrots in your Kimchi, but I preferred the carrots over the radish. The radish was kind of bitter if you’re into that sort of taste.
Add 3 Tbsp. of fish sauce if you omit shrimp paste, which I don’t recommend
1 Tbsp. of Korean red pepper flakes is medium-hot, 3 is fiery hot, and 4 is almost inedible. If you can handle 5, then more power to you.
You can find shrimp paste and Korean red pepper flakes at your local Asian Market
Equipment:
1-2 large bowls
1-2 small plates
Colander/strainer
Gloves
Cutting board
Knife
2 large Mason jars
Something to weigh the Kimchi down, like a can of beans
Tray to place under jar during fermentation
Directions:
Cut the cabbage lengthwise through the stem in half. Keeping the cabbage lengthwise, cut in 2-inch strips up until the core. Don’t cut all the way through. Turn the cabbage 90 degrees and cut 2-inch squares until you get to the core. Discard the core and any pieces without the cabbage leaf on it. The core tastes very bitter and doesn’t have as many nutrients as the leaves. Repeat for cabbage #2.
In a large mixing bowl, fill up as much as you can with cabbage. Use a second bowl if you need to. To make the process easier, I split the cabbage in half. Add ¼ cup of salt into each bowl. Massage the cabbage with your hands until it feels soft.
Add the water up to the top of the cabbage to fill the bowl(s). Place a heavy object on top of a plate to keep the cabbage submerged. Let it sit for 1-2 hours.
Make your sauce. In a small bowl, add all of the remaining ingredients except your carrots and green onions. Mix until it starts to form a paste.
Cut your carrots and green onions. Set aside.
Using your colander, wash and strain your cabbage 3x. Let it dry for 5 minutes before you repeat.
In your large mixing bowls, combine cabbage, carrots, and green onions with your sauce into one bowl. Using gloves mix everything together until the paste is fully incorporated.
Add your Kimchi into 2 large mason jars, leaving an inch of room. Using your fist (with gloves on), squeeze the Kimchi down to extract the brine until it is completely submerged in liquid.
Place your jars in a cool, dark room using a tray to catch potential drippings.
Let it sit for 1-5 days checking/tasting each day to see if it gets to your desired fermentation. It will start to taste a bit sweeter. That’s when you know it’s done.
Refrigerate for 24 hours before consumption. Enjoy for many months (up to 6). Just note that the more you leave it in the fridge, it will continue to ferment.

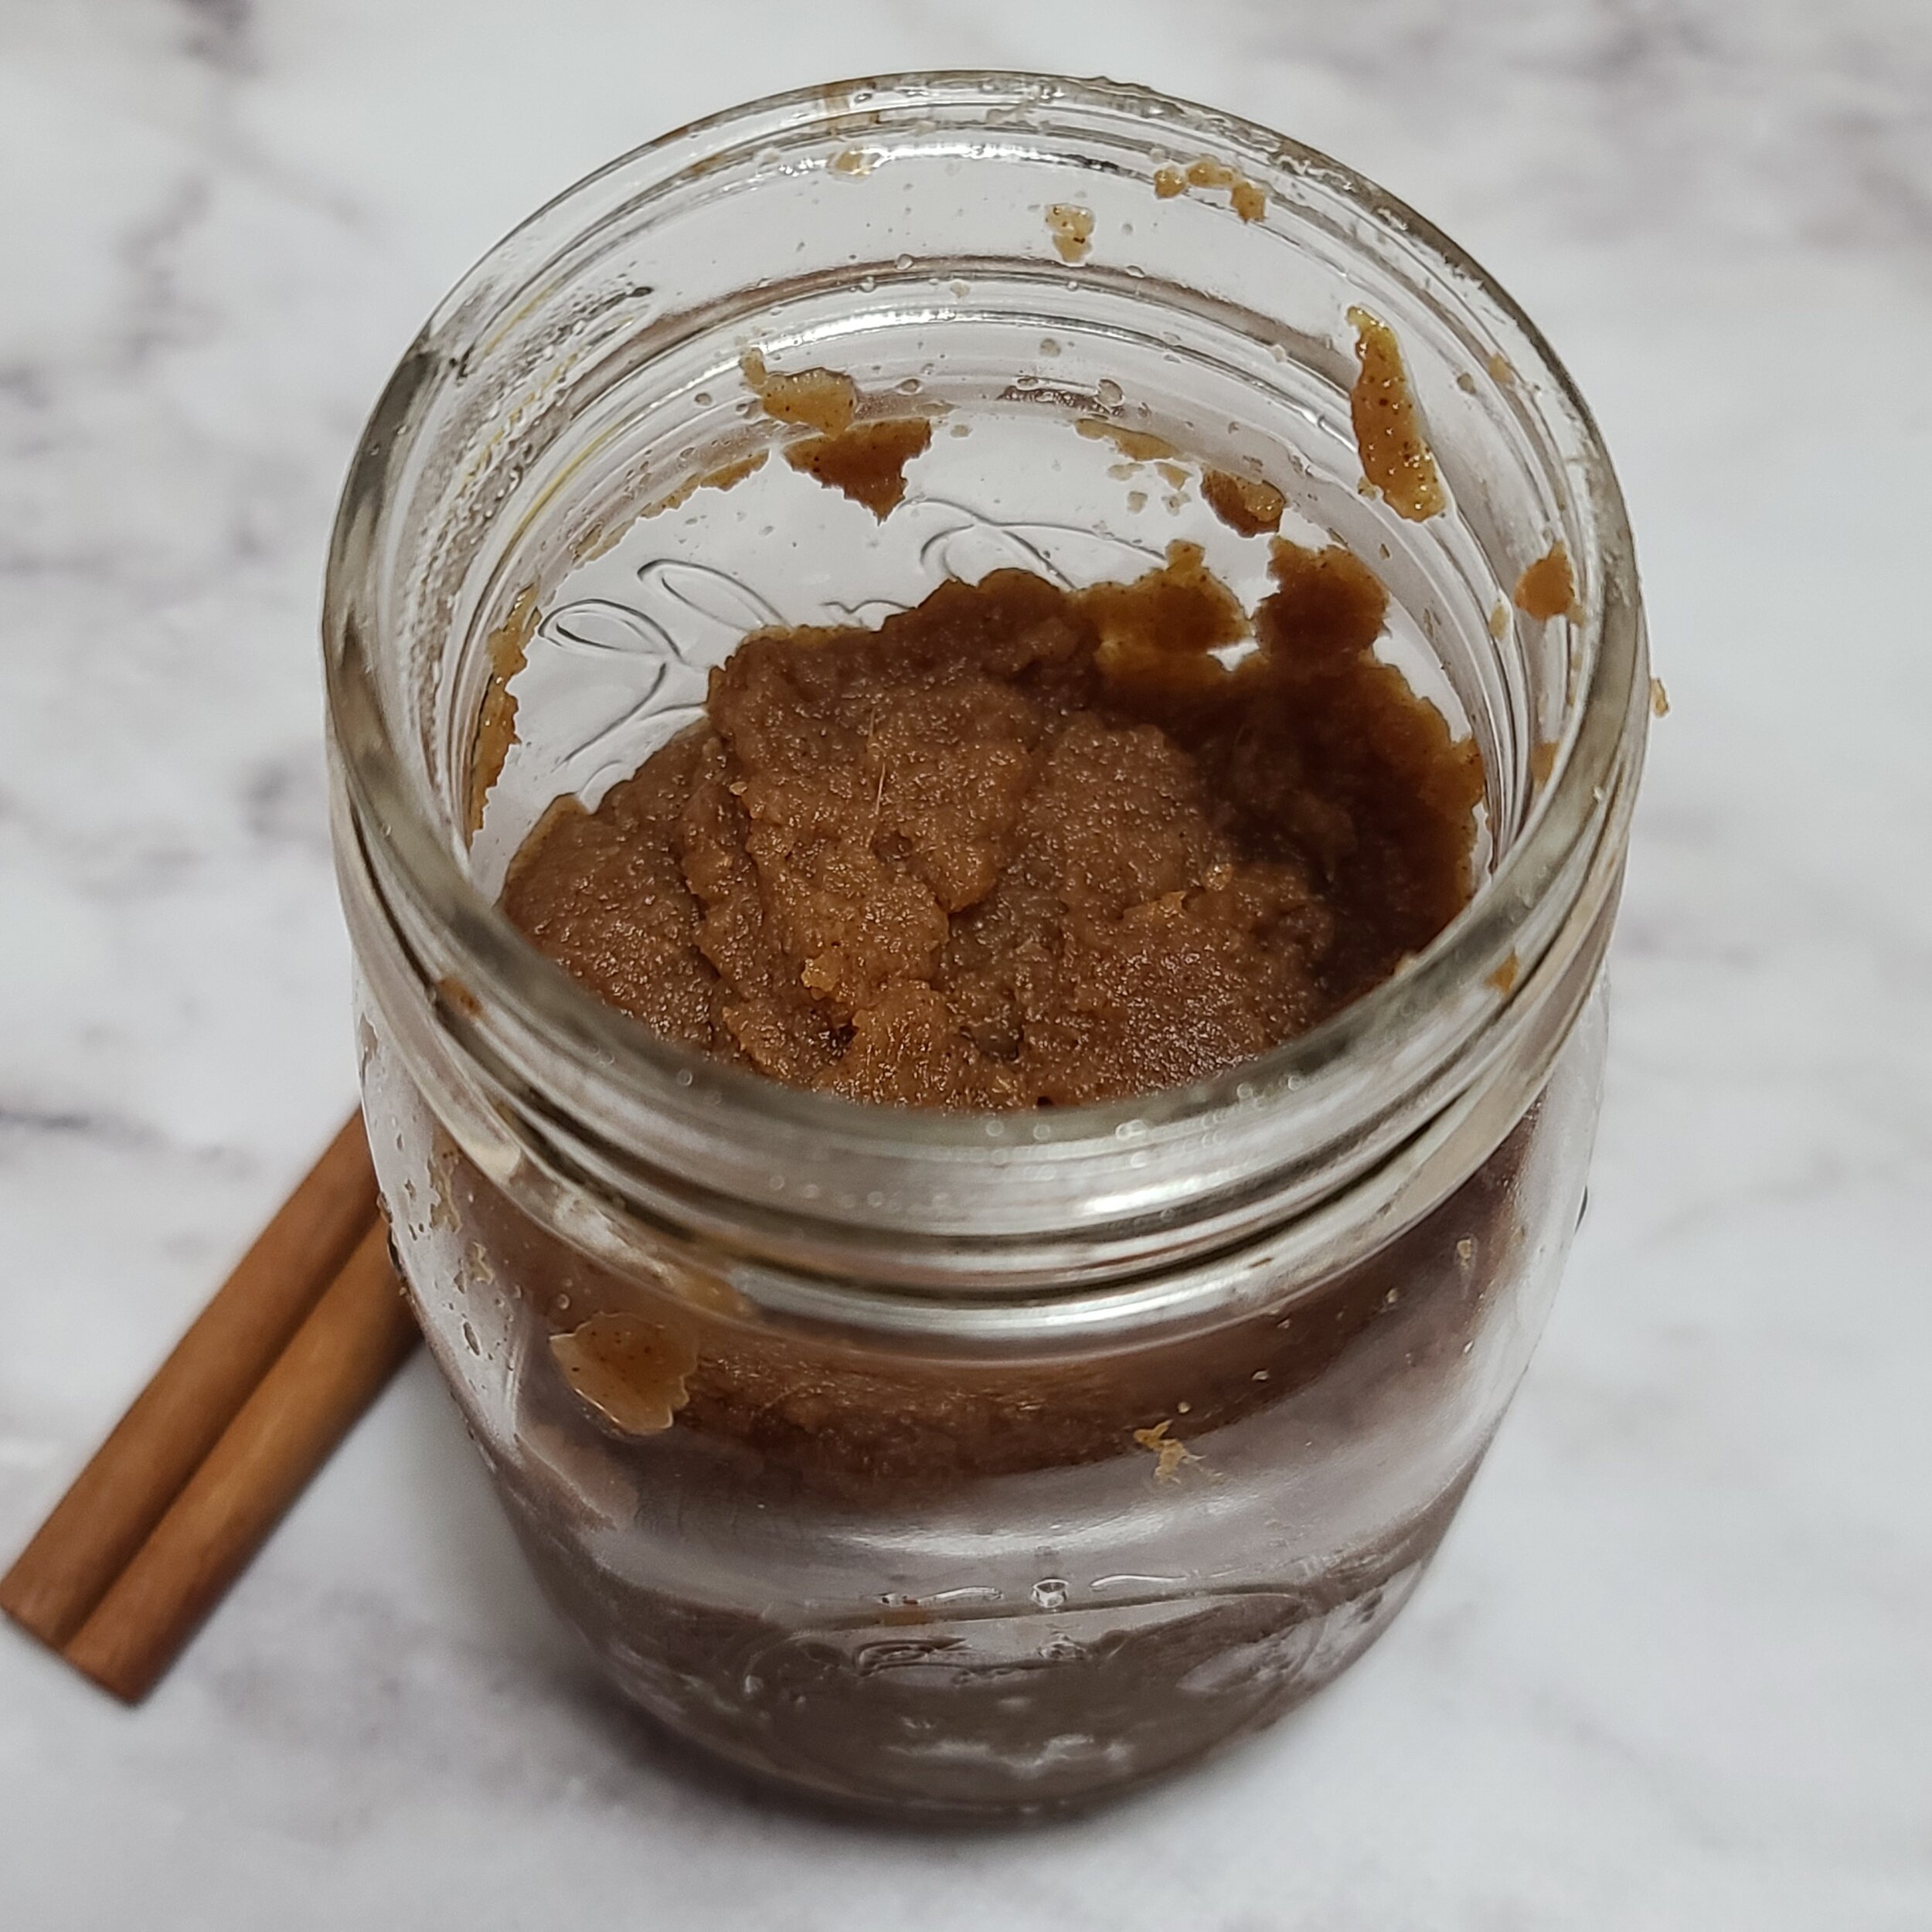
Homemade Kombucha Apple Butter
You don’t have to wait until Fall to get your hands on this apple butter. This simple recipe will give you approximately 16 oz of apple butter that will last for weeks.
You’ll never want to buy store-bought apple butter again once you try this recipe.
When I started brewing kombucha, the first flavor I tried was apple cinnamon chai. The apples are my favorite fruit to infuse in kombucha because it takes the flavor well. It tastes like you’re eating apple cider apples once it’s all done. It’s a new hobby I took up while mostly staying at home during the Covid-19 pandemic. It doesn’t take much time at all and it does the work on its own. Find my recipe for Apple Cinnamon Chai Kombucha.
Honeycrisp apples are my favorite apples to infuse because their already sweet flavor makes the apple butter much sweeter. I personally leave the peels on for more fiber because I enjoy all parts of the apple.
It tastes great on pretty much anything, including:

Bread
Pancakes
Cookies
Muffins
I used the apple butter in a filling to create apple cinnamon chai muffins and holy wow! I don’t eat muffins often, but these are worth the calories. The best part is making a glaze out of powdered sugar and the kombucha. It’s really simple and takes these muffins to the next level. The first time I tried making these muffins with almond flour and no eggs came out flat and I ended up cooking the muffins on a high temperature to make a cookie instead.
I spread them on my almond flour pancakes as an alternative to having syrup. I promise you won’t miss the syrup when you spread apple butter on your pancakes.

If you want to can this recipe to store for the fall, put it in a closed mason jar and store in boiling water for 10 minutes until you hear a popping sound. Store in a cool, dry place like your basement when you’re ready to eat. Personally, I didn’t do this step because I wanted to eat it right away.
Or, if you’re hungry any time of the day, the apple butter creates a quick snack on a piece of bread. Simply, throw it in the toaster or air fryer and enjoy this spreadable treat. Try this apple butter on anything. It’s pretty versatile. I’d love to learn about what you spread your apple butter on for some more recipe ideas I can create for the RAD community. Find my recipe below and start your creating your master pieces.
Inspired by: https://bakingamoment.com/homemade-apple-butter/
Ingredients:
about 4 pounds apples (roughly 9 medium-sized apples), peeled and cored
1 cup homemade Apple Cinnamon Chai Kombucha, divided (or just use apple cider NOT vinegar)
A handful loosely packed light brown sugar
1 Tbsp. honey
2 teaspoons ground cinnamon
1/4 teaspoon ground cloves
1/4 teaspoon kosher salt
4 pods fresh cardamom
¼ teaspoon ground allspice
1-inch knob of fresh ginger from your Kombucha (or use a fresh one)
Juice and zest of half a lemon (about 1 tablespoon)
Directions:
Place the all of your ingredients (except the lemon and a the kombucha) salt in a large pot, and cook over medium-low heat, uncovered, (stirring occasionally) until the apples have become very soft. The apples will be a bit watery at first because they have been infusing in the kombucha. I only added a little bit of kombucha at a time or else it will be too liquidy.
Use a hand blender to puree the mixture (or ladle it into a regular blender in batches) until smooth.
Place the puree back into the pot and continue to cook, uncovered, (stirring occasionally) until thick, velvety, and deep mahogany brown (about 1 hour).
Stir in the lemon juice and zest, transfer the mixture to jars, and keep refrigerated. It will last about a month (if it makes it that long)

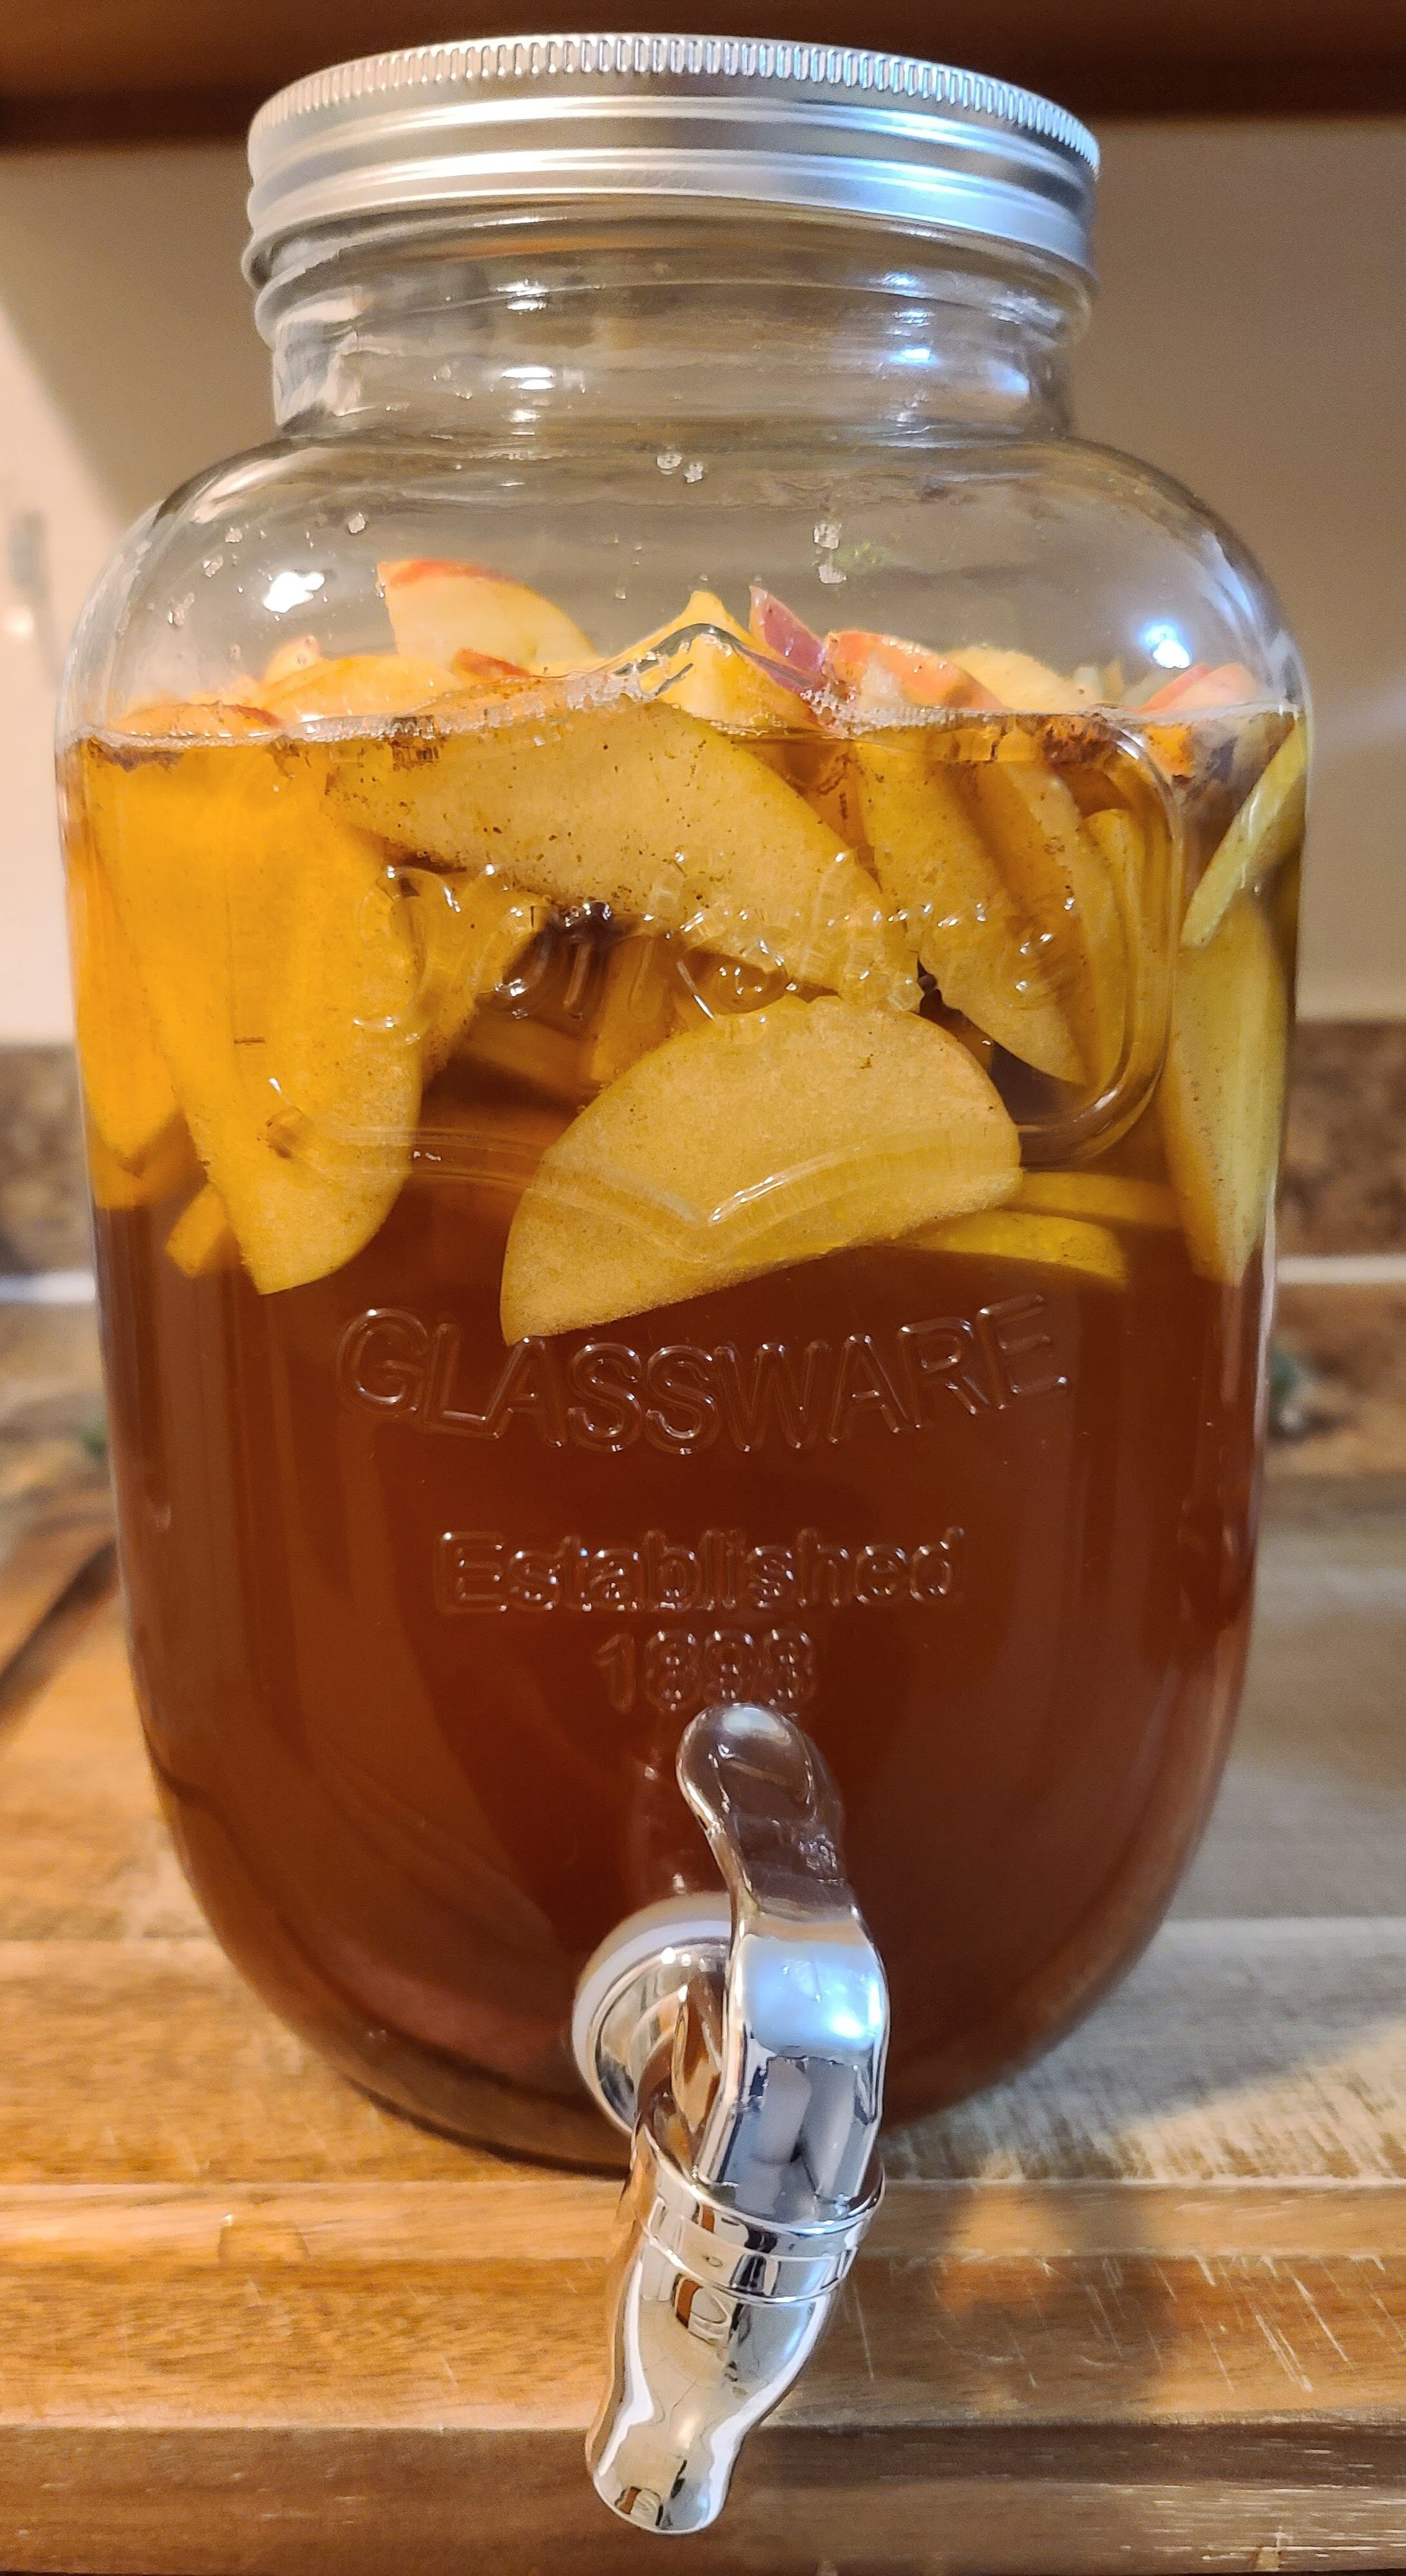
Apple Cinnamon Chai Kombucha
A fun DIY and low-maintenance activity that will yield you the best-tasting Kombucha you will ever have in 4 weeks.
Introducing my first ever batch of kombucha. I infused black tea and a SCOBY with sugar for 3 weeks. After removing the SCOBY, I pour enough of the brew in a mason jar to cover the mama and newly formed baby SCOBY. Then, I let apples, fresh ginger, and an array of other warming spices infuse for 24-48 hours before bottling. I’ll have them sit for 1-5 days [“burping” the bottles at least once a day] depending on the batch before putting the kombucha in the fridge for consumption.
COVID-19 has been the birth of new hobbies, such as canning and bottling. With all the free time I have been unemployed with no children, I wanted to delve into something new. Kombucha has been something I have enjoyed for many years. It has gut-healthy probiotics, which help with digestion. With the prices ranging from at least $2.99 per 16 oz bottle, it was pricy to continue buying store-bought Kombucha. Now that I’m no longer living at home with my family, I have more room to store everything. It is a wonderful feeling to have the space and energy I need to expand my creativity. The inspiration began when my friend gave me my first SCOBY from her home-brewed batch. SCOBY stands for symbiotic colony of bacteria and yeast. This is what ferments the tea.
Before brewing, I had never even heard of a SCOBY. While I learned a bit about fermentation in my IIN (Institute for Integrative Nutrition Health Coaching) course, I forgot all about it. Just like any information, it’s easy to lose it unless you use it. I used Google and Kombucha Kamp to figure out how to make my own brew. I needed to make sure I had the proper equipment on hand or else I could easily screw it up. What I ended up needing are:
1-gallon jar with a spigot —> I ordered one off Amazon for a little over $20. Seriously, the spigot makes for a much quicker bottling experience. Feel free to order more if you want to make multiple brews at a time. You need the jar so you can allow your brew to ferment before bottling.
100% tightly woven dishcloth —> You can get these from Wal Mart on the cheap
3 1 liter soda jars with stopper lids —> I bought a pack of 6, so I can make 2 brews at once
1 4 lb bag of sugar —> You don’t need all of it, but you will use a lot if you are doing multiple batches
Tea bags —> Green Tea, White Tea, or Black Tea are your best bet for optimal health of your SCOBY
I understand it’s a lot of up-front costs at first, but you won’t need to buy the supplies again. In the long run, the money spent will save you later when you have 3 liters of Kombucha at your disposal per batch. If you follow the recipe and directions, you are bound to have a successful batch of Kombucha that will last for at least a month. I’m excited to share with you the first recipe (and my favorite) I ever brewed. If you love the fall taste of Honeycrisp apple cider that is carbonated, this is for you. The ingredients are as follows:
Ingredients:
For the Kombucha:
3 ½ quarts water, divided
1 cup sugar
8 black tea bags (I used Bigelow Vanilla Chai Black Tea)
1 SCOBY (make your own or get one from Kombucha Kamp) with prepared liquid
1-gallon jar with spigot
1 100% cotton tightly-woven dishcloth
1 large rubber band
6 16 oz soda jars with stopper lids (or 3 1 liter bottles)
1 funnel (if you opt-out of using a spigot)
For the Apple Cinnamon Chai Spices:
4 large honey crisp apples (or 7 small apples)
5 cinnamon sticks
2-inch knob ginger, peeled and cut in half
½ tsp ground cloves
4 whole cardamom pods (or ¼ tsp of dried cardamom)
1 Tbsp. brown sugar
1 tsp vanilla extract (only if you use regular black tea)
More honey to sweeten (optional)
Directions:
1) Brew 1 quart (4 cups) of water with your tea bags and sugar. Bring to a boil to dissolve the sugars. Let it cool before you transfer your liquid to the jar. I left my brew sit for 2-3 hours or you can leave it overnight.
2) Transfer your liquid to your mason jar. Add the remaining 2 ½ (10 cups) of water to your jar. WITH CLEAN HANDS, grab your SCOBY and transfer it to your jar. This begins the fermentation process. Close your jar with a dishcloth and rubber band. Store in a cool, dark place for 3 weeks. I checked my brew 1x/week to ensure my Kombucha is healthy. A second SCOBY should start forming form along the top of the jar. After a few weeks, the SCOBY should be fully formed. If your momma SCOBY sinks to the bottom, it’s still good.
3) When your Kombucha is ready, you can use the SCOBY again for a new batch. WITH CLEAN HANDS, transfer your SCOBYs with 2 cups of your liquid to a separate mason jar. This will become your SCOBY hotel to use for future batches of Kombucha. Add your spices to your jar and let it sit for 24 hours – 3 days.
4) Transfer the Kombucha to your soda bottle using your spigot or funnel. Let sit for 1-5 days for fermentation #2. Be sure to “burp” your bottles at least once per day to avoid a fizzy explosion upon consumption. Burping is where you pop the lid without fully letting all the air out.
5) Transfer to the fridge and enjoy after 24 hours. These will last 2-4 weeks.
** I took all of the apples that I infused in my Kombucha and made them into apple butter. It’s so freaking delicious. You will never be able to find something at the store like this.
There are many questions that people ask when they are trying to brew their first batch of Kombucha. I am here to answer a few of them to help you along the way of brewing the perfect batch without fail. With my trials and tribulations, I will share what I’ve learned. Please note that this does not guarantee a successful brew, but this serves as a guide when you are stuck.
1. What fruits can you put in your Kombucha? —> I have tried everything from apples, peaches, pomegranate, mangos, strawberries, blueberries, raspberries, cherries, and kiwi so far. Just be careful because some of the smaller fruits like blueberry and pomegranate get stuck in the spigot and can clog it. However, using the berries has made for some of my favorite brews. It’s a risk you have to be willing to take.
2. Can you use Chai Tea in Kombucha? —> I highly DO NOT recommend using Chai Tea in Kombucha. The oils from the Chai can damage the SCOBY. The black Chai Tea I used for this recipe has come out successful. Using LOOSE LEAF Chai Tea is the only time I’ve ever had a failed batch. The SCOBY didn’t form properly on the top, which means it did not ferment correctly. It was bubbly and broke easily. I had to discard the entire batch. L
3. Can you use Loose Leaf Tea in Kombucha? —> You can. It’s a gamble every time. It’s not recommended because of the risk of damaging the SCOBY from the oils. I have used two different types of loose leaf tea that had more fruit and floral notes in them. Those batches came out successful. Again, the only time I ever had a failed batch is by using loose leaf Chai Tea.
4. How many times can you use a SCOBY? —> I have used mine for many months. Until the SCOBY turns black or gets mold on it, there is no issue using the same SCOBY for multiple brews.

5. How do you store your SCOBY? —> I use mason jars with Kombucha liquid (before infusing it with fruits) and make a SCOBY hotel. There, I can store multiple SCOBYs in there. I recently bought another gallon jar because I have so many SCOBY’s I don’t even know what to do with all of them. I add fresh brewing liquid to every brew (about 4 weeks) in order to make sure that the SCOBYs don’t get moldy.
Have any more questions? Feel free to contact me and I will be more than happy to start a conversation with you.
Happy Brewing!
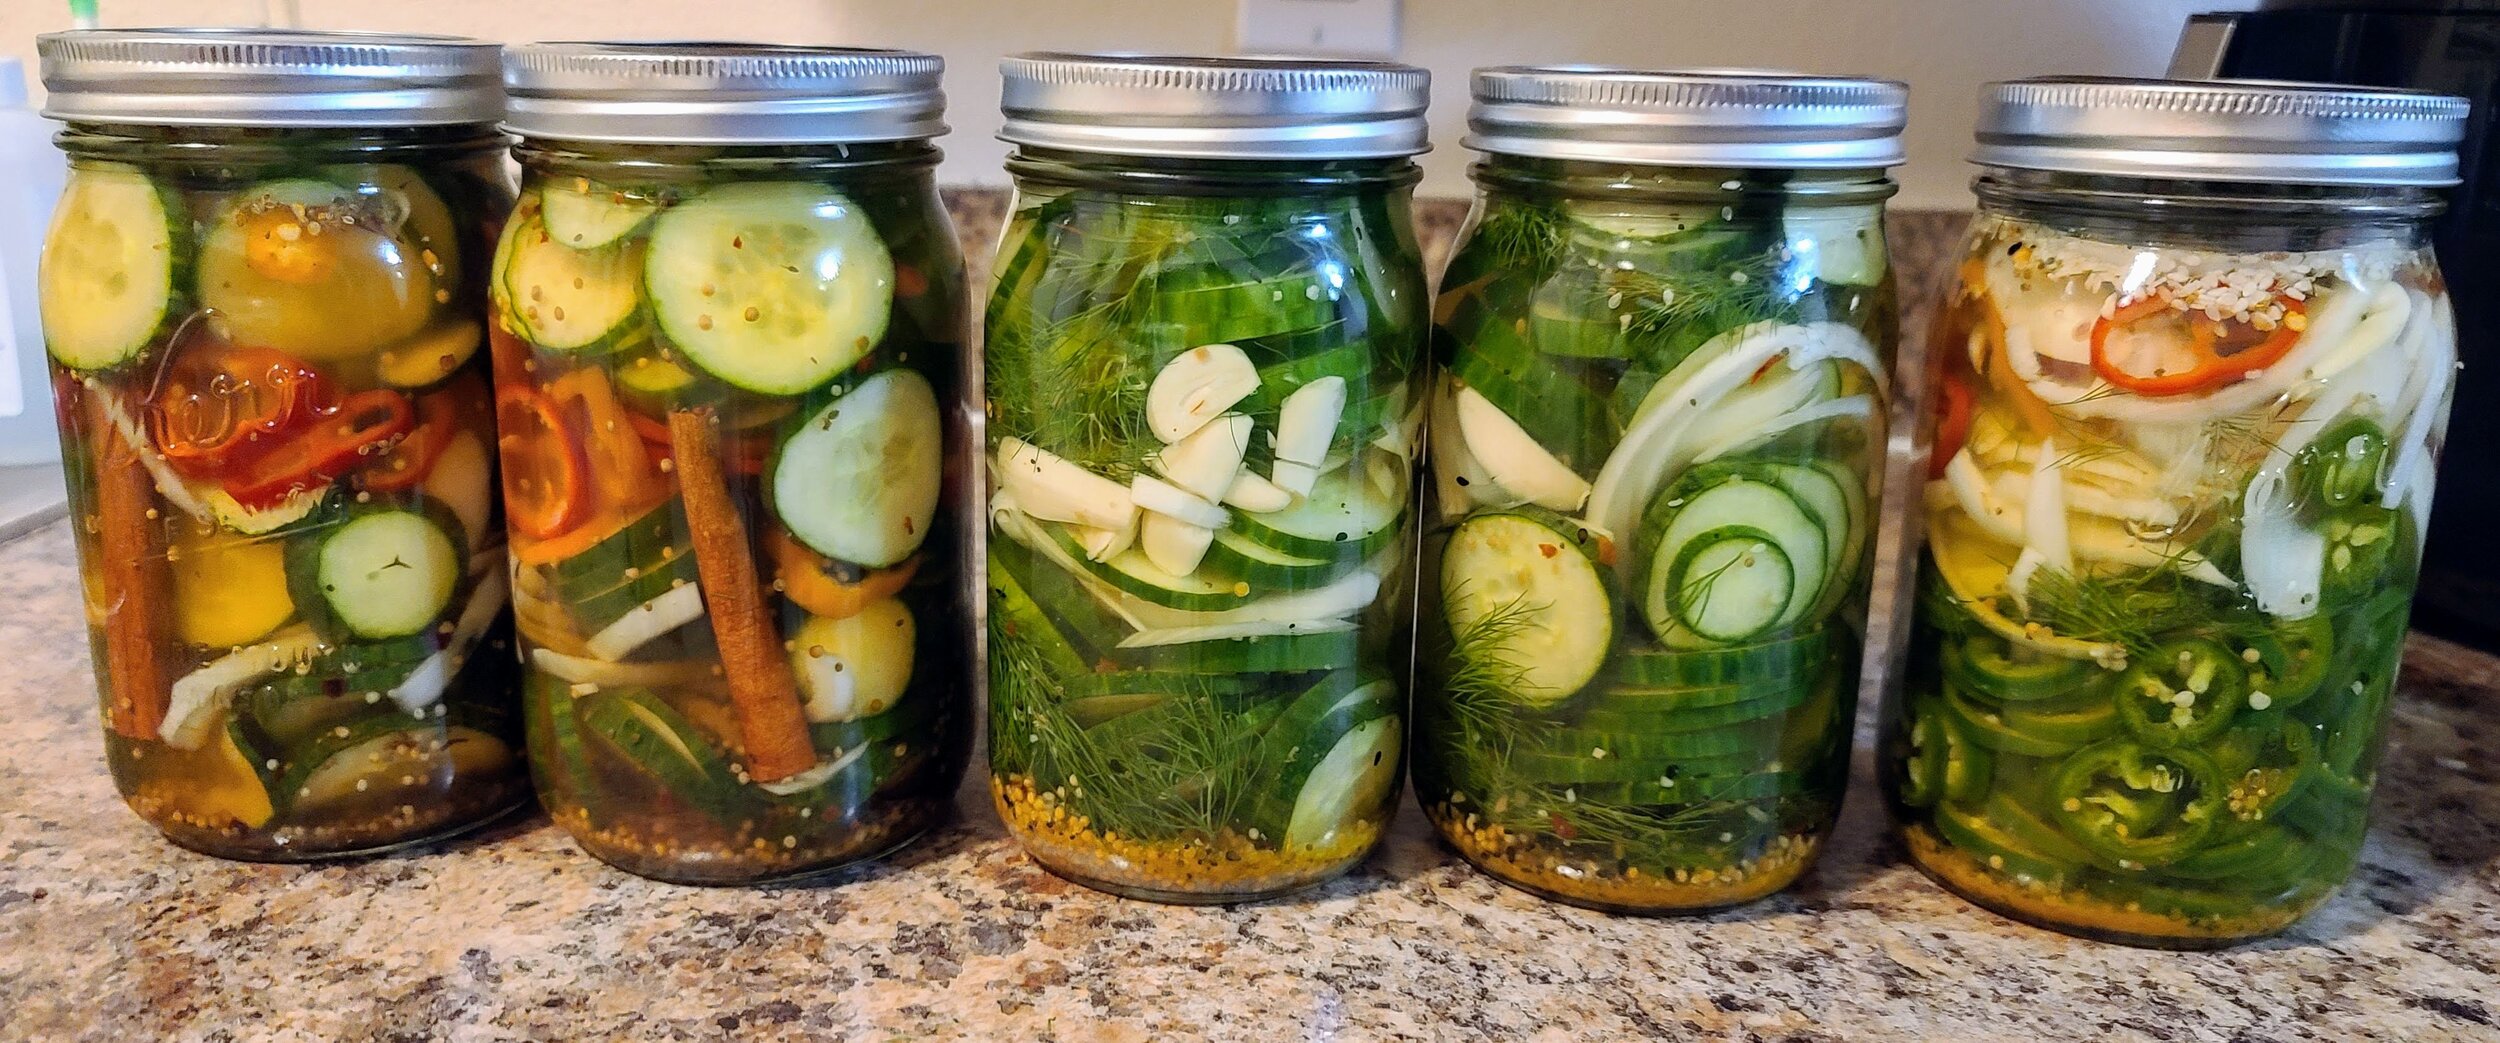
Everything Bagel Seasoning Dill Pickles
Tasty enough that even the non-pickle lovers will enjoy!
Those of you who know me understand how much I love pickles. For starters, I grew up eating a pickle with my lunch throughout grade school. It’s how I finished every meal. I love the taste of dill pickles. It’s salty and garlicky with a crunchy bite to make this a great snack. I’d go through multiple pickles a day and a whole jar in less than a week. That’s because I mostly ate them straight from the jar.
When I was in college, I started caring more about my nutrition. I read the ingredients on the label of my favorite jar of pickles: Claussen Pickles. I was shocked, but not surprised to find a bunch of preservatives and a large amount of sodium per pickle spear. You can find the nutrition facts here. After years of eating Claussen pickles, I got sick of the after taste it gave me. Do you know that salty taste left in your mouth when you eat potato chips? I had to drink multiple bottles of water afterward to get the taste out of my mouth.
I stopped eating pickles for a while once I started cooking my own food from home. The only jars of pickles that have all clean ingredients I’ve found at Whole Foods. These are at least $7 per jar. The amount of pickles you get isn’t worth the cost in my opinion. I don’t know why it took me this long to make my own at home. I watched my dad make whole pickles and it took over a month for them to finally finish. When they were done, they didn’t taste nearly as good as I was hoping.
It never crossed my mind to make pickles until I moved to Florida and all of my new friends love pickles as much as I do. The cravings I used to have came back. A bunch of my friends had birthdays recently, and I figured it would be the perfect gift for them on their birthday. What started with one test batch turned into the best dill pickles I ever had. The secretly not so secret ingredient is Everything Bagel Seasoning. Adding homemade vegetable stock elevated the taste by giving the pickles more of an aromatic flavor. Each recipe yields 2 jars of pickles. You’ll have to make these for yourself and taste exactly what I mean.
Ingredients:
2 English Cucumbers, sliced thin
½ white or yellow onion, sliced thin
A handful of fresh dill (I used ½ a container in each jar)
1 large bulb of garlic, peeled and halved
2 cups homemade vegetable stock
2 cups white vinegar
¼ cup cane sugar
3 Tbsp. sea salt
1 Tbsp. mustard seeds
¼ tsp dried mustard powder
½ tsp celery seed
½ tsp turmeric
1 Tbsp. fresh black peppercorns or use freshly cracked ground pepper
1 Tbsp. Everything but the Bagel Seasoning
2 large mason jars
Directions:
1) Slice your cucumbers and onions thin with a knife or a mandolin. Cut the onion in half first before slicing on the mandolin.
2) Add all of your liquids, salt, and sugar to a saucepan. Bring them to a boil and remove from the heat. Keep stirring continuously until everything is dissolved. Let cool for 5-10 minutes.
3) Divide all of your spices and liquids evenly into two mason jars.
4) Add your cucumbers and onions. Stir to incorporate everything evenly.
5) Close the mason jars and store in the fridge for 1-3 days until the flavor is infused. Enjoy for up to a few weeks if they last that long.
** Note: You can use the same brine again with a fresh batch of cucumbers. I’ll use it for up to 3 batches. Make sure that you replace the used dill with fresh dill once it starts to go brown. I used a fork to get the dill out of the jar.
PS: If you live in the Central Florida area near Tampa, I’ll make you jars of pickles for your next party or for your own personal use. Contact me for more information.
